Right-hand side menu tiles can be added to the home page, all pages or select pages only, allowing you to highlight important content.
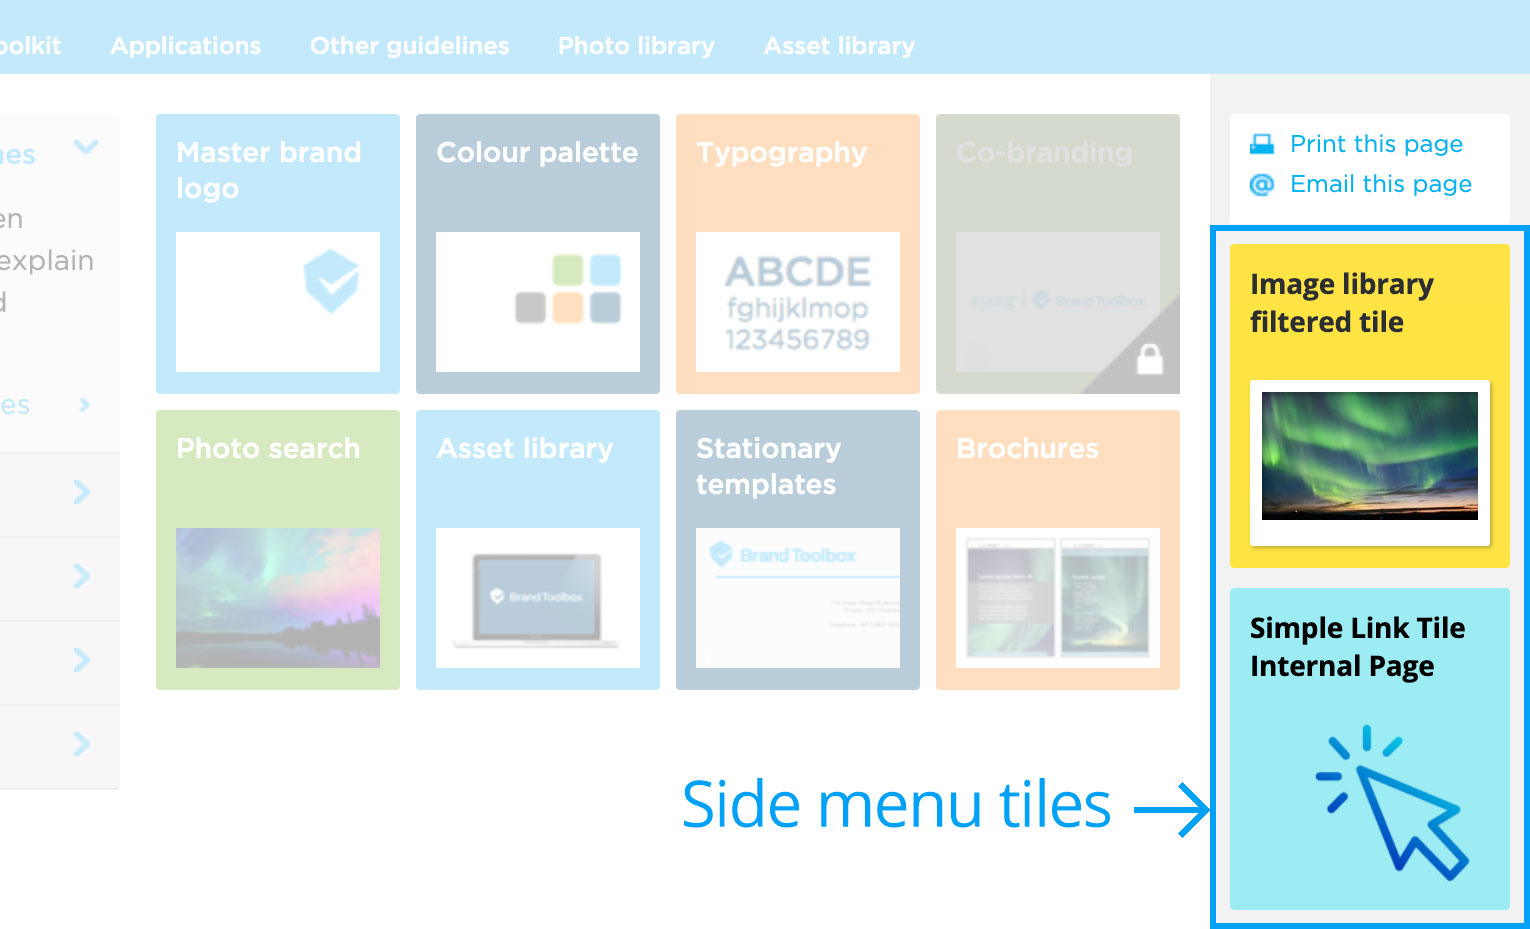
The tiles can link to an internal page, external URL or be a direct downloadable link to an asset or image.
There are three tile types available:
| Type | Use |
|
Creates a tile that links to an internal page, external URL or a direct downloadable link to an asset or image in the Asset/Photo libraries. |
|
|
Creates a tile that links to the Asset library and (optionally) allows you to filter the library by Brand, Category, Colour, File Format, Orientation and by Search Term. |
|
|
Creates a tile that links to the Photo library and (optionally) allows you to filter the library by Category and by Search Term. |
To add or edit a side menu tile, you must have access to the Settings page.
Adding a tile
Follow these steps to add a new tile:
- Select the Settings > Side Menu Tiles page (node) from the Content section tree.
- Ensure the Child items tab is open and from the Create dropdown menu, choose a tile type based on your link or download needs.
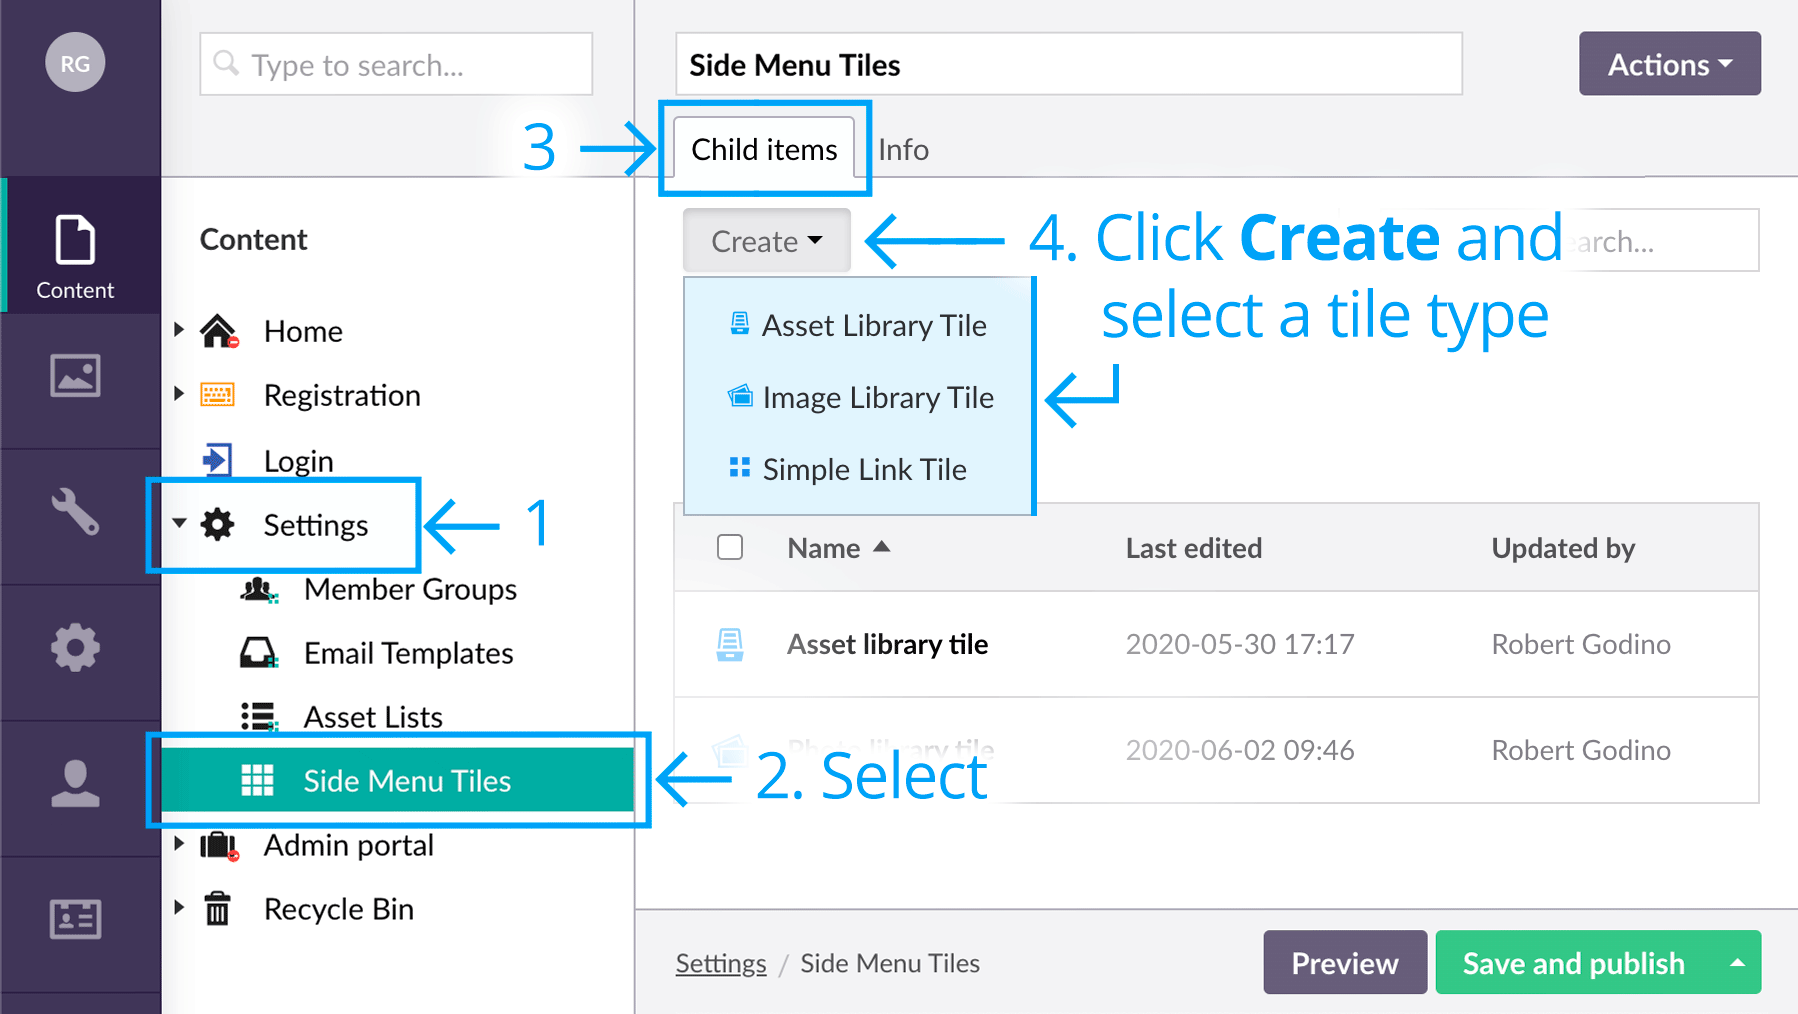
- At the top of the screen, ‘Enter a name...’ for the tile. This name is for backoffice reference only (it will not display on the tile).
- All other required tile properties are further explained below.
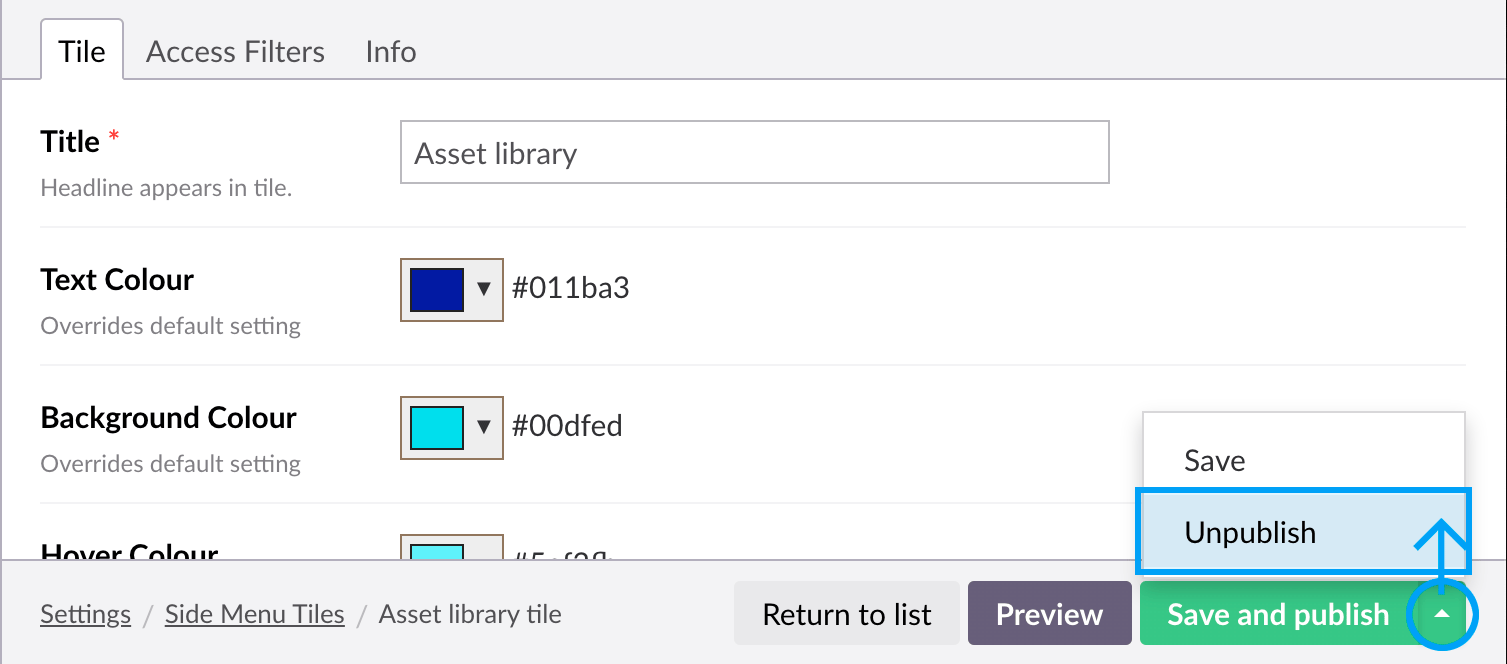
Tile properties and values are displayed in the ‘Tile’ tab.

| ‘Tile’ tab | Description |
|
Title * |
Headline that appears in the tile. Keep it short! |
|
Text Colour, Hover Colour |
Entering a colour value will override the default (global) tile colour settings. Leave blank to retain the global settings. Though it isn’t necessary to change the tile colour, using different tile colours highlights and differentiates the tiles.
After choosing a colour, remember to click ‘Choose’ before closing the colour picker. |
|
Image * |
Tiles must have a display icon or image. Click the Add [ + ] icon to select an image to sit within the tile, or click the Edit (pencil) or Delete (x) icon on the existing image thumbnail to select another image. Existing images are currently stored in the RHS tiles folder within the Media section (see file path below) and will display at 120px wide x 82px^ high.
~/Media/Guideline display visuals/Home/RHS tiles
^ Note that images can display at any height and will scale proportionately to 120px wide. Best size is no larger than 240px W x 164px H @ 72dpi (and saved as a transparent PNG-24, if a contoured image is required). |
|
Link * |
Click Add to set the tile to link to an internal page, external URL or an asset or image in the Asset/Photo libraries.
To link to an internal page, select a page under the root ‘Home’ node and click Submit.
Remember to click Submit after a selection is made. |


The ‘Access Filters’ tab

The ‘Access Criteria’ dropdown menu allows you to set where the tile will be displayed – in the RHS panel of the home page, all pages or select pages only.
| ‘Access Criteria’ options | Description |
|
{ blank } |
To display tile on all pages, leave blank. |
|
Hide on selected pages |
To display tile on all pages BUT hide on select pages, select “Hide on selected pages” and add page links in the Pages property. |
|
Show on selected pages |
To display tile on select pages ONLY, select “Show on selected pages” and add page links in the Pages property. |
|
Unpublishing a tile |
To temporarily hide a tile, select “Show on selected pages” BUT do not add any page links. You can also hide a tile by unpublishing it. When in tile editing mode, click Unpublish from the Save and publish menu.
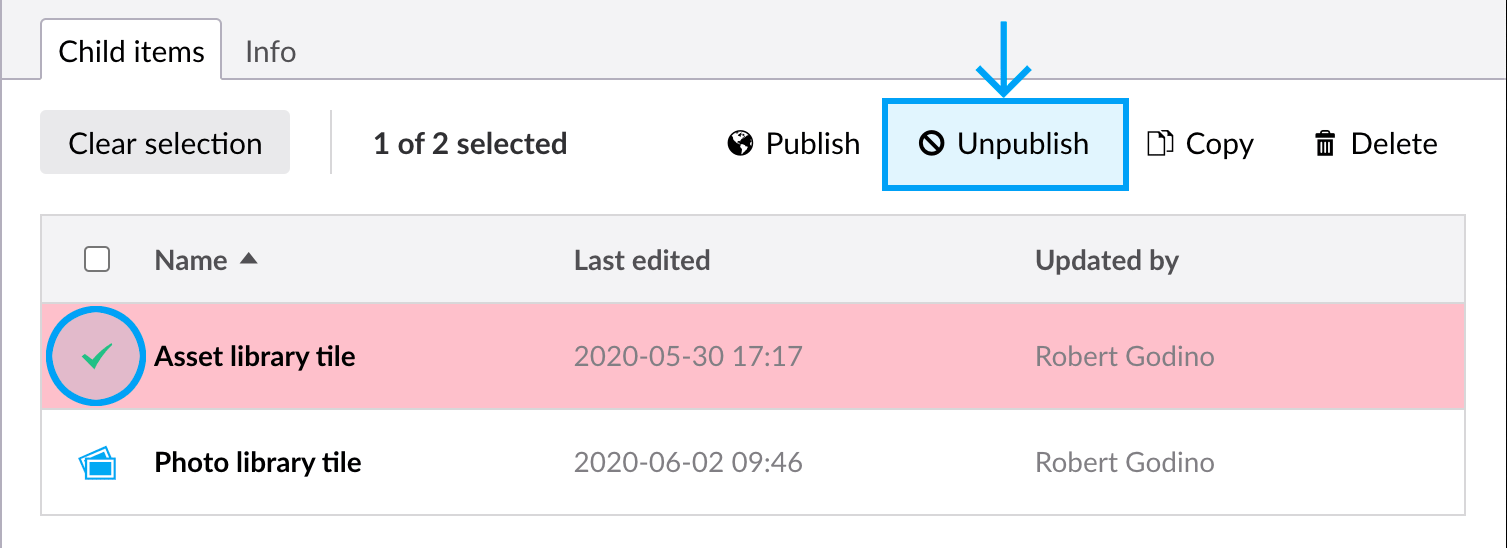
To unpublish the tile from the Side Menu Tiles list, select the tile in the list and click Unpublish.
|
Asset Library Tile
The Asset Library Tile type allows the tile to link to the Asset library and (optionally) filter the library by Brand, Category, Colour, File Format, Orientation and by Search Term.
In addition to the tile properties outlined in Simple Link Tile above, it includes the following filters:
| ‘Tile’ tab | Description |
|
Asset Brand, |
Select a value from the dropdown menus available. The Asset library will filter by the entered values selected. |
|
Asset Category |
Click Add and navigate to the ‘Categories’ folder of the Home > Asset library folder in the Content tree. Select a category or subcategory. |
|
Search Query |
Enter a value in the text field provided. The Asset library will filter by the entered search term. |
Remember to click Save and publish after making your choices.
Image Library Tile
The Image Library Tile type allows the tile to link to the Photo library and (optionally) filter the library by Category and by Search Term.
In addition to the tile properties outlined in Simple Link Tile above, it includes the following filters:
| ‘Tile’ tab | Description |
|
Category |
Click Add and navigate to the ‘Categories’ folder of the Home > Photo library folder in the Content tree. Select a category or subcategory. |
|
Search Query |
Enter a value in the text field provided. The Photo library will filter by the entered search term. |
Remember to click Save and publish after making your choices.
Editing, Sorting or Deleting a tile
Edit a tile
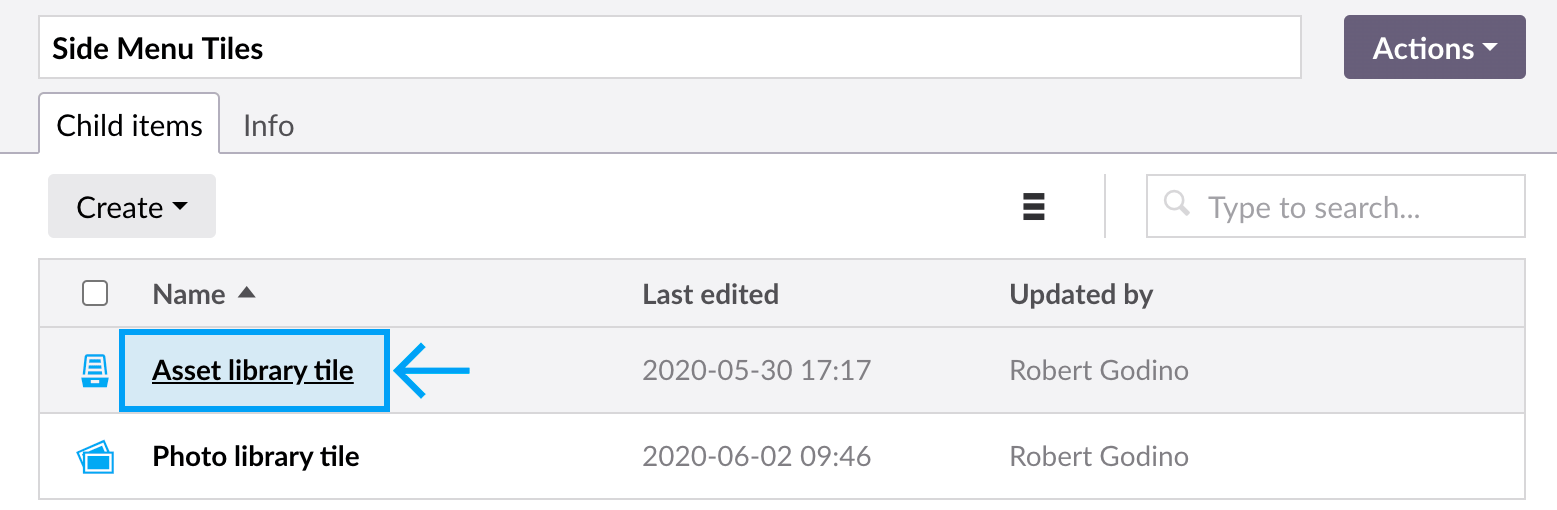
To edit an existing tile, click the tile Title (name) and make any changes.
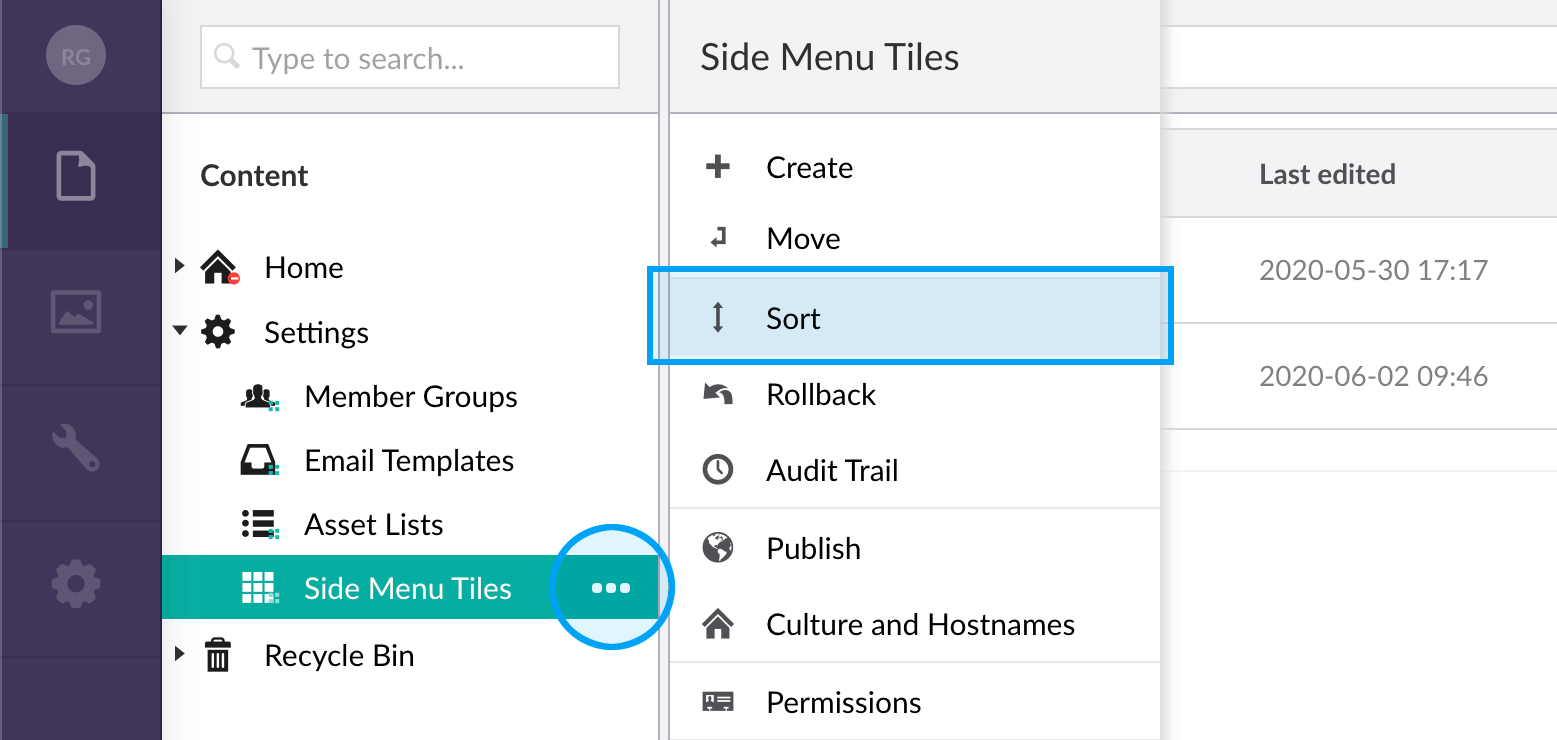
Sort tiles
Tiles can be vertically stacked (sorted) into any order. Right-click the context icon ‘•••’ next to the Side Menu Tiles node and select Sort. Move (drag) the tiles into the desired position.
Delete a tile
Once deleted, tiles cannot be restored. Therefore, simply unpublish them if you believe you may need to reuse them in future.
Updated: 3 June 2020
Next page: Branding
Back to top