Follow these steps to create, edit and distribute a Brand Update email newsletter.
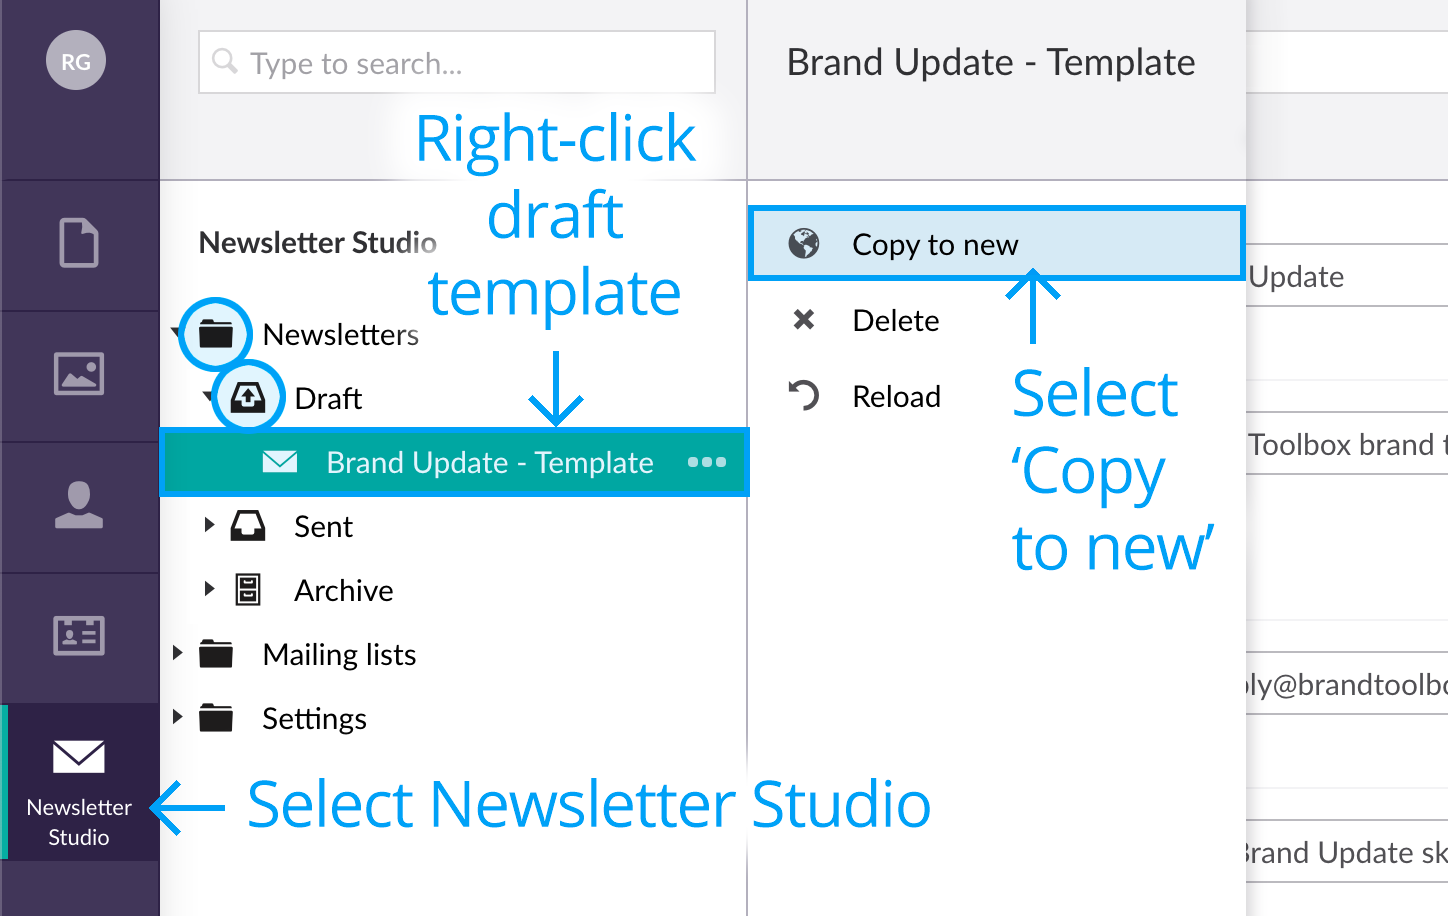
Select the Newsletter Studio module in the left-hand Section bar. You will only see the module if you have been given prior permission to create and edit newsletters.
To create a new newsletter, select one of the blank drafts in the Newsletters > Draft folder. Right-click an existing draft and select ‘Copy to new’ – so you don’t overwrite the original template.
Assign a new name to the communication in the popup window and click ‘Create' to confirm. The name should be relevant to the communication and easily identifiable to all Administrators (e.g. Brand Update - Jan 2020 - New Signage section). This is an internal reference only.

Select your new draft copy and in the content edit area:
- Edit the ‘Subject’ field for each communication. This is the subject line that will appear when recipients receive the email in their inbox.
- Generally, leave the ‘Sender name’ as is, as you want your regular recipients to know the communication is coming from you.
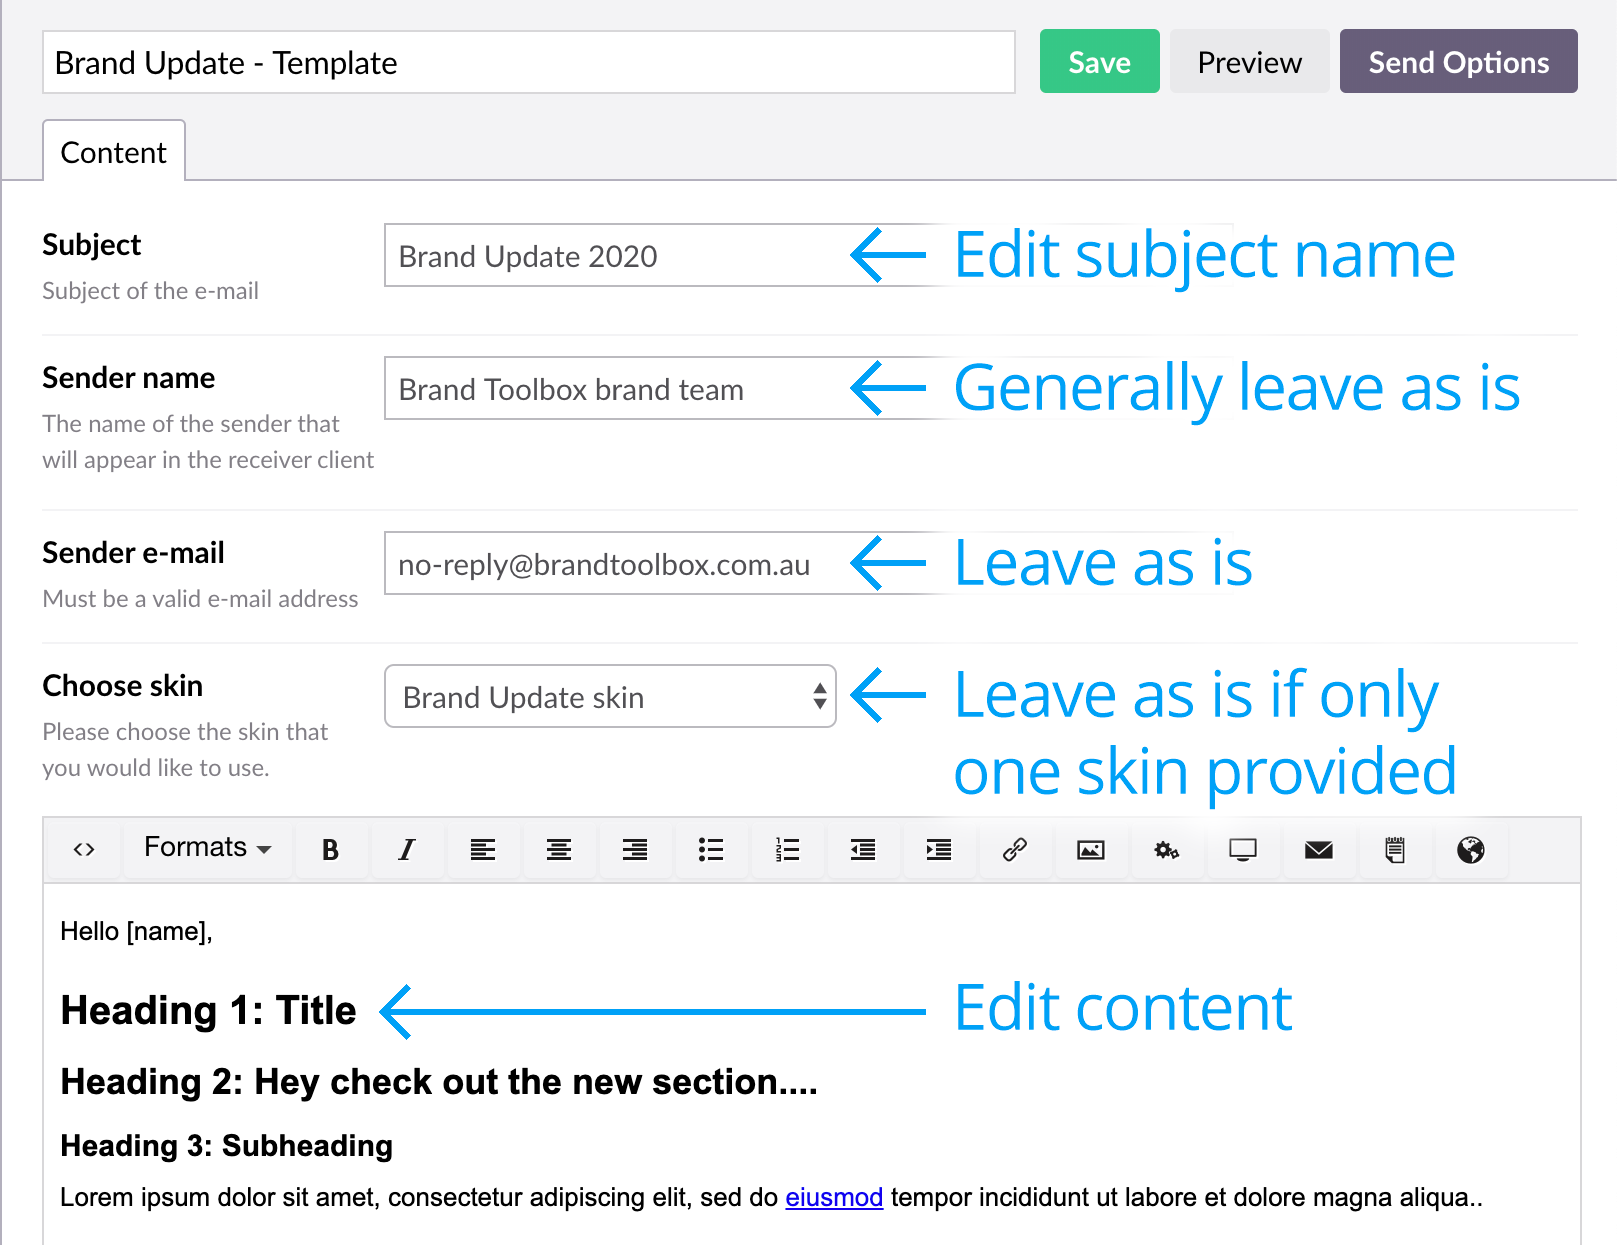
- DO NOT change the ‘Sender e-mail’ address, as it’s best to use the ‘Sender e-mail’ assigned at setup. This is the email address that will appear in the From Email Address field in the recipient’s inbox. Note that using your email or your business’s email address might result in your Mail Server blocking the email. For more info, speak to your Brand Toolbox Administrator.
- Most customers will only be provided with one template ‘skin’, so if this is the case, do not alter the skin.
You edit the contents of the newsletter as you would a standard guidelines page. All text in the email content body can be changed, however, DO NOT delete the [name] tag^, as this will add the member’s name in the email that they receive. After you have finished writing the content and added all your text, links and images, you are ready to send the newsletter.
^ If you do accidentally delete the [name] tag, you can reinsert it via the Insert newsletter merge field button in the rich text editor. E.g.

Save your changes regularly.
Save, preview and send e-mail
At the top-right of screen on the open newsletter editor, you have three choices: Save, Preview and Send Options.

Save
Save will save any changes made in the draft and allow you to finish and send the email at a later date. Saving will not distribute the email.
Preview
Always view a Preview before distributing to ensure the newsletter is rendered correctly by typical email browsers and that all included links/images are displayed and working correctly.
A screen will appear with a rendered copy of your draft. If any changes need to be made, close the panel, make the change and select ‘Preview’ to see the changes made.
Send Options
Once you are happy with the newsletter content, you are ready to distribute the email campaign.
A slide out panel will appear prompting you with three options:
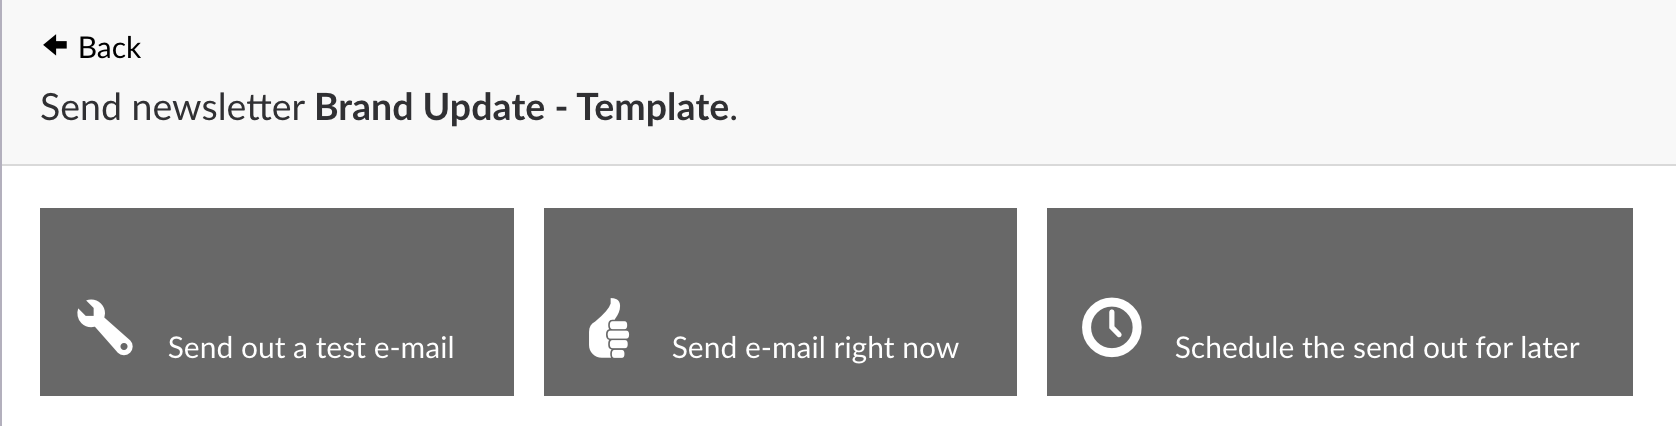
- Send out a test e-mail – This will allow you to test the email in a real e-mail client – you can enter your email address. When Send test e-mail is clicked, a preview email will be sent directly to the email entered. Allow up to five minutes for the email to reach the mailbox of the entered recipient. Note also that the recipient’s name will not be displayed in a preview email.
- Send e-mail right now – This will allow you to send the email to individual Member Groups or to all members. To send to all members, check the Member checkbox under the Umbraco members heading, and click Send now. You can also send to individual or multiple groups by selecting the relevant boxes. Upon confirmation, the email will be distributed to the checked groups. Allow up to five minutes for the email to reach the mailbox of the entered recipient.
- Schedule the send out for later – You can schedule an email to be distributed at a future date and time. This may be useful to automatically distribute emails on the date of a new brand/product launch.
Note: Wait until the dialog box informs you that it has sent before closing the page, as send times vary depending on size of member database.
Sent emails and archiving
All sent newsletters are moved to the ‘Sent’ folder in the structure tree. When the message is older than 90 days, it is moved automatically to the ‘Archive’ folder.

Clicking on a sent newsletter brings up the following analytics dashboard.
Newsletter reporting
Newsletter campaigns can be tracked with our web reporting and analytics tool: Newsletter Studio Analytics. View more information on the Newsletter reporting page.
Duplicate a sent email campaign
To duplicate (copy) a sent email campaign, select it from either the ‘Sent’ or ‘Archive’ folders.
Right-click one of the sent campaigns in the Newsletters > Sent folder and select ‘Copy to new’ (see below).
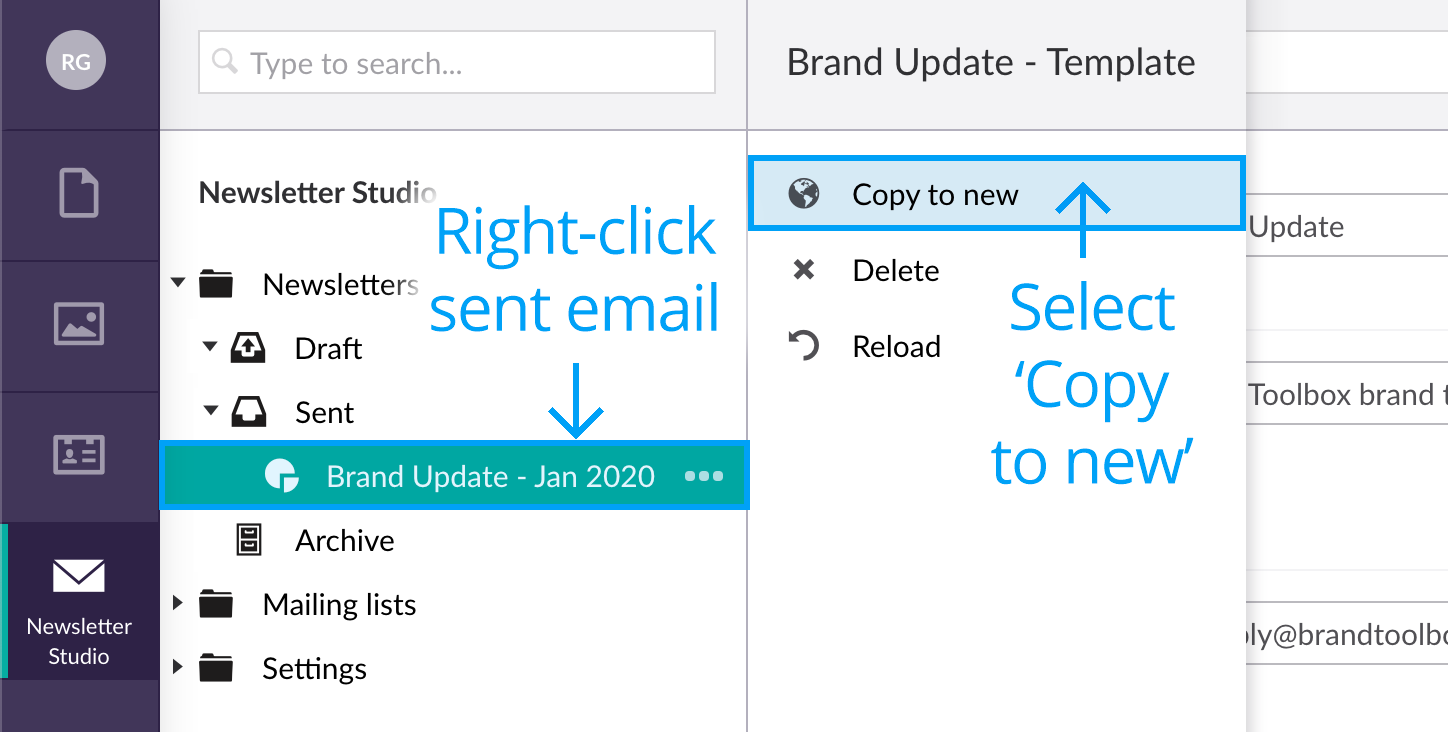
Enter a unique newsletter name and click ‘Create’. The new newsletter draft will be placed in the ‘Newsletters > Draft’ folder.
Next page: Newsletter reporting
Back to top