Photographic Talent Release & Consent Forms can be assigned to images in the Photo library.
Once assigned to an image, users browsing the Photo library can see that the selected image has a photo consent form (or forms) associated with it. Privileged member groups (usually Editors & Admins) can also download the consent form directly from the frontend and view the backend filepath.
To add consent forms, follow these three simple steps below:
Note: To assign talent release and consent forms to videos or other assets in the Asset library, view Video consent forms.
1. Create a ‘Consent Form Folder’
Note: Only create a “Consent Form Folder” if it doesn’t already appear in your “Photo Library Folder”. If it does, skip to step 2. Upload the photo consent form below.
To create a “Consent Form Folder”:
- In the Media > Image library section, right-click an existing “Photo Library Folder” node and select Consent Form Folder from the ‘Create’ actions menu.
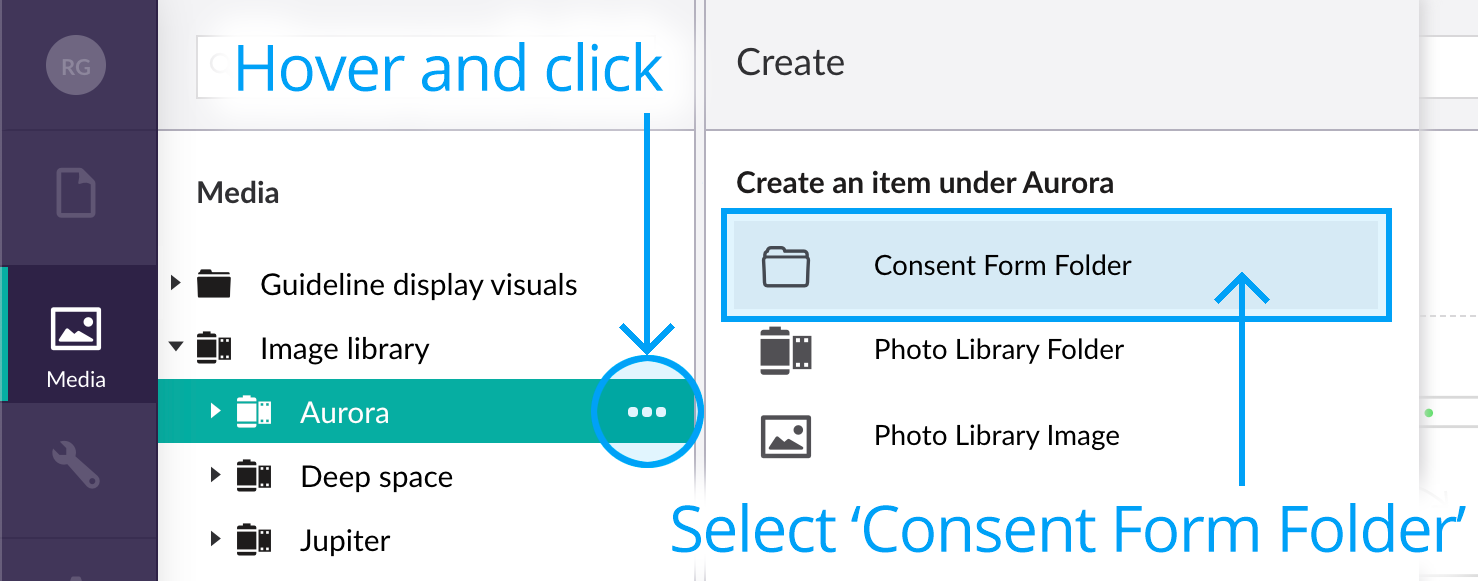
- Type in the folder name, e.g. “Photo Consent Forms”, and click Save.

2. Upload the photo consent form
Photo consent forms can be batch-uploaded to a ‘Consent Form Folder’. To upload the consent forms in batch:
- Select an existing “Consent Form Folder” node.
- Select the consent form files from your desktop and drag ‘n’ drop them into the content upload area.
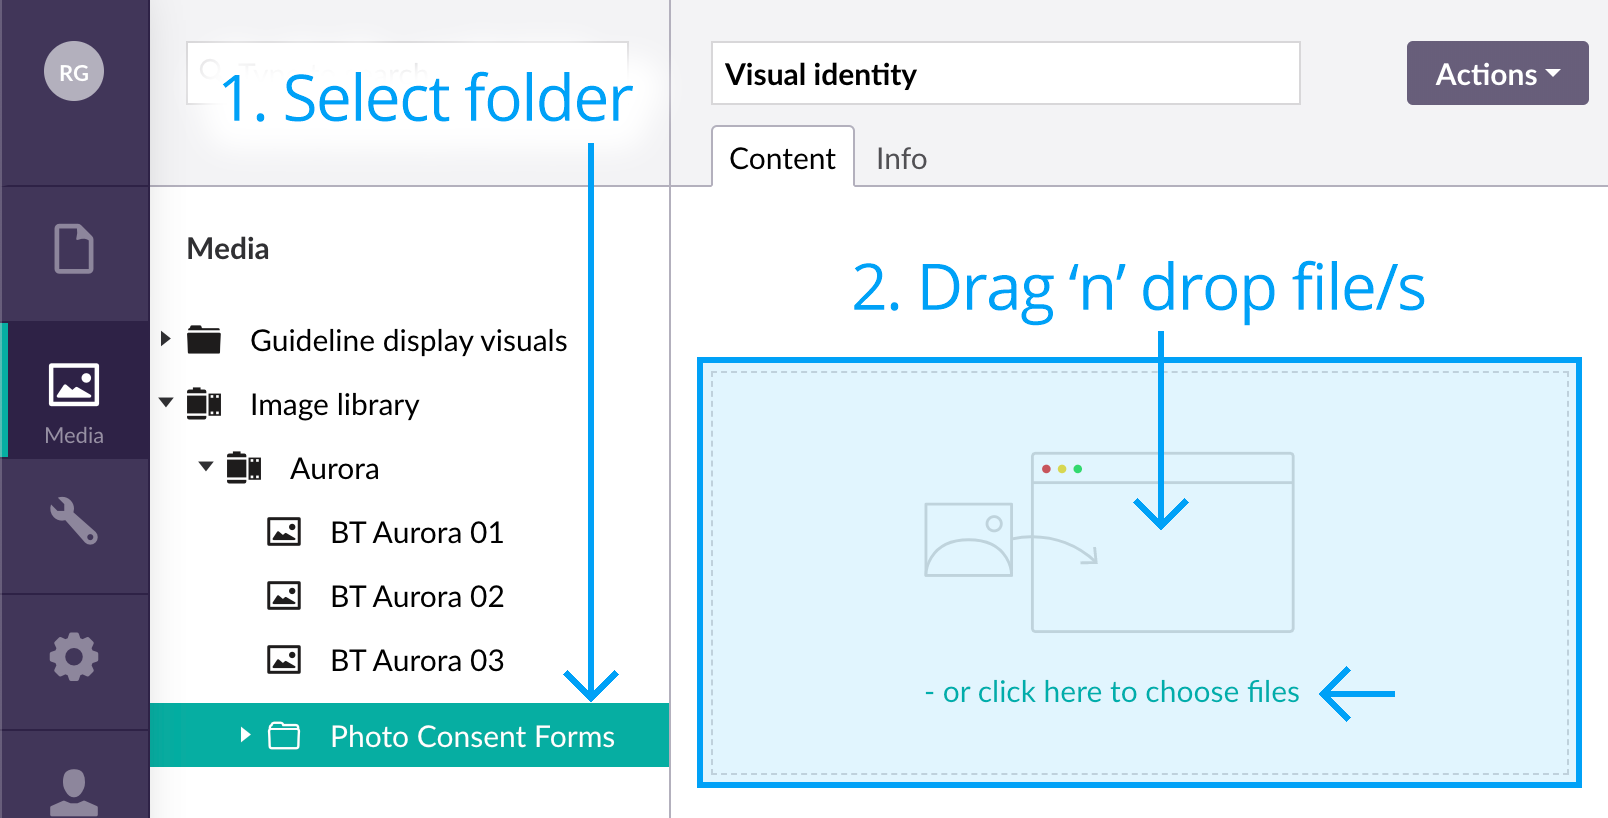
- They will upload immediately as ‘File’ asset types.
You are now ready to: 3. Link images to the uploaded consent forms.
Note: Consent forms can also be uploaded or edited individually via the process below but it is far simpler to just drag-n-drop as shown above.
To upload or edit consent forms individually:
- Right-click an existing “Photo Consent Forms” folder node, click Create from the actions menu and select File from the Create menu.
- Type in a name for the consent form (e.g. “FirstnameLastname_Date.jpg” or “PhotoShootNumber_FirstnameLastname_Date.pdf”).
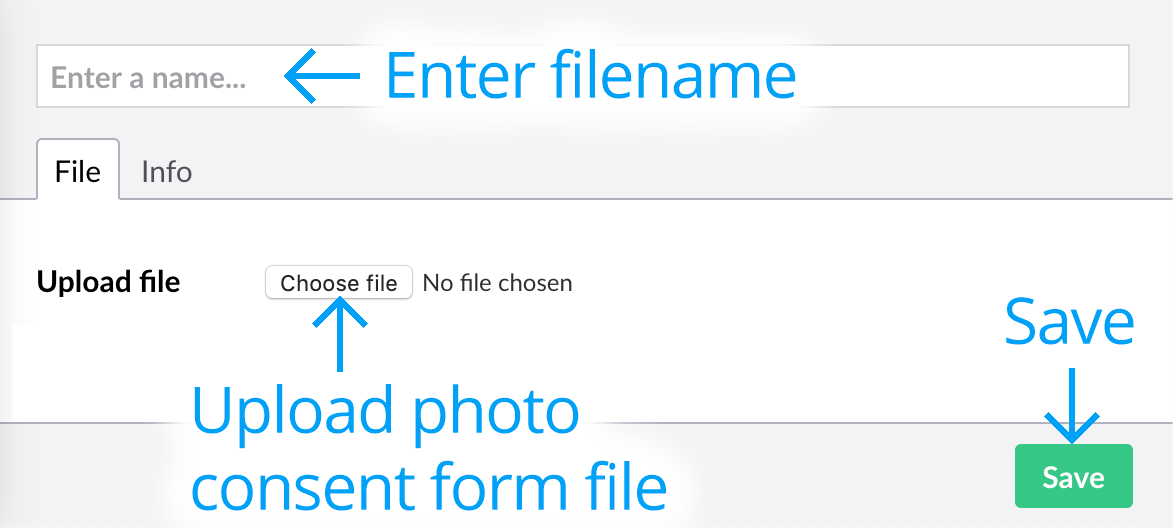
- Upload the photo consent form file via the “Upload file” button and click Save.
3. Link images to the consent form
Now that the consent forms have been uploaded, you can assign them to one or multiple images.
To assign the form to an image:
- Select the image in the Media > Image library section and select the Meta Data tab.
- Scroll down to the Consent forms picker and click Add.
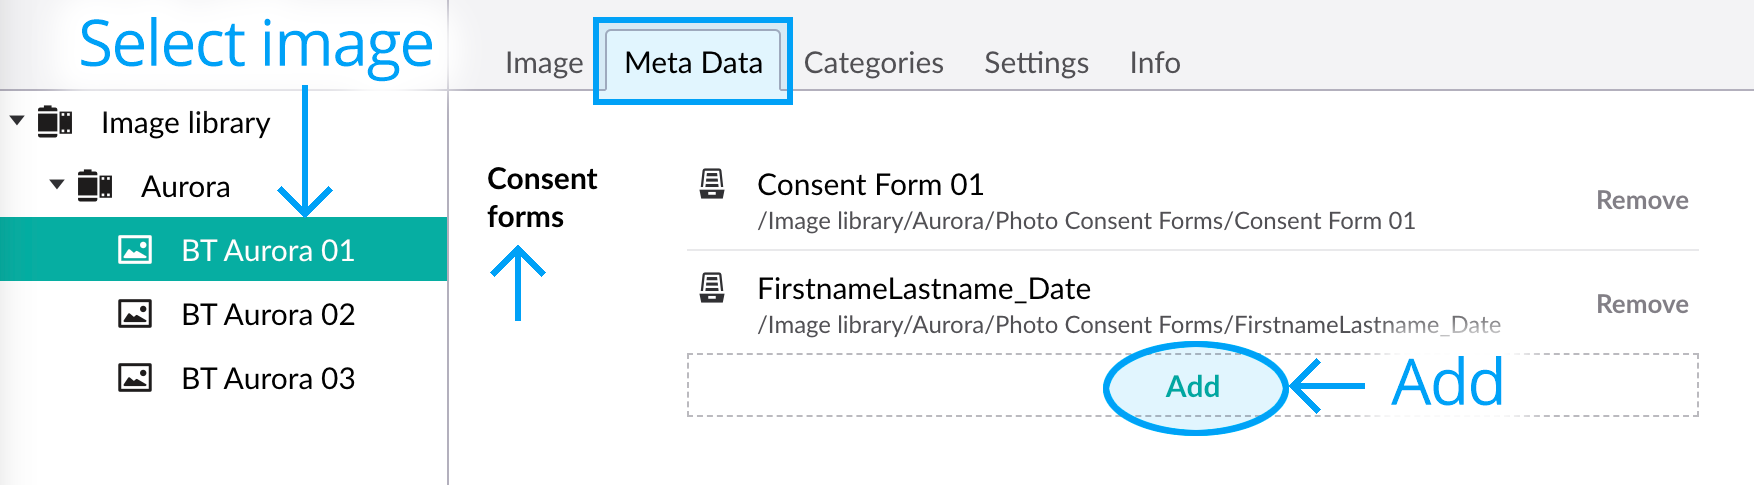
- In the slide out menu, choose the consent form relevant to your image. Note that multiple consent forms can be linked to a particular image.
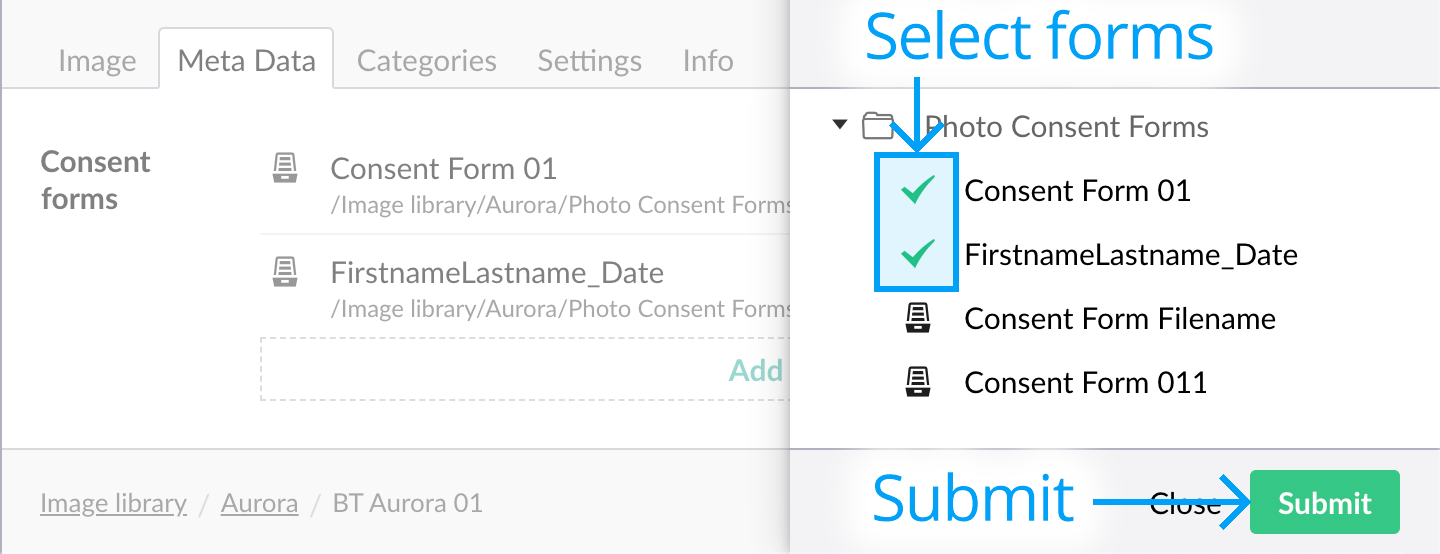
- Click Submit and then remember to Save the image.
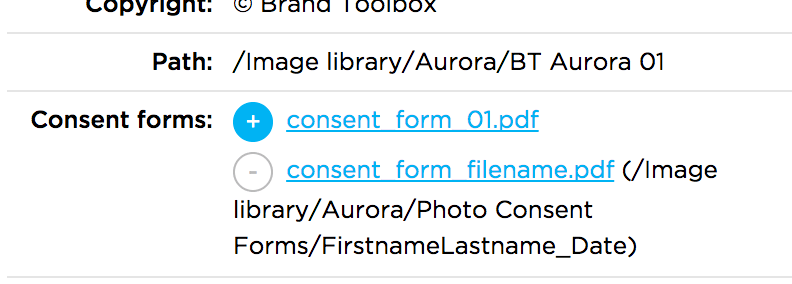
Frontend users will now be able to see (or download) the consent form in the image detail per the example below:
Note that users can only download the consent form if their member group has permission to download consent forms. To enable consent form download, view “Consent form download settings” below.
If a member group:
- HAS PERMISSION to download consent forms, the frontend user will be able to download the consent form and view the backend filepath.
- DOES NOT HAVE PERMISSION, they can only see the consent form filename but cannot download it. It simply shows them that a consent form is associated with the image.
Enable consent form download
To enable consent form downloads for a particular member group:
- Select the individual member group in the “Content > Settings > Member Groups” section.

- Select the “Settings” tab and toggle on the ‘Can Download Consent Forms’ property flag.
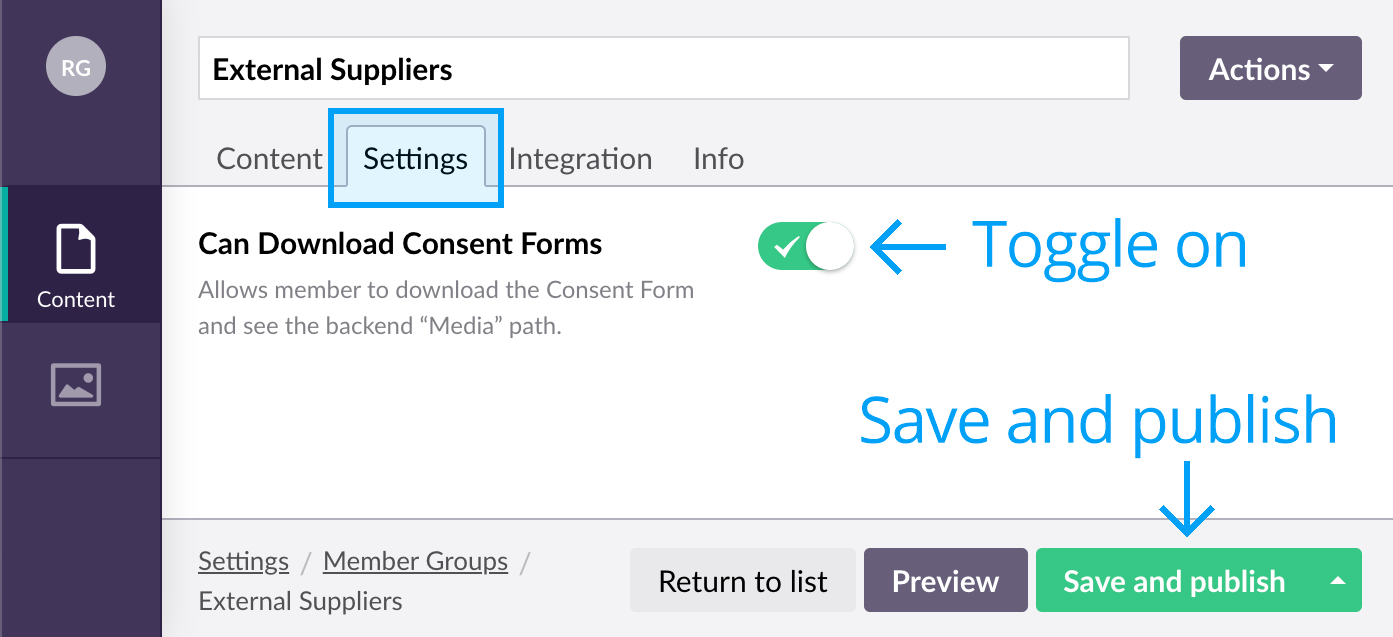
- Click “Save and publish”.