In this section, we will be showing you how to manage images and files within the Media > Guideline display visuals folder, which contains all the display visuals that appear throughout general guideline pages. These are generally low resolution images used to clarify guidelines content and displayed as examples for information provided on the page.
If, however, you are looking to manage Photo library images or Asset library items, click the following links instead:
Uploading an Image or File
Always remember to choose the correct media type when uploading an Image or File!
- Select the folder where you would like to add your new image or file.
- Drag ‘n’ drop the image/s or file/s into the upload area. Choose Image (or File) when prompted in the Choose media type slide out panel.
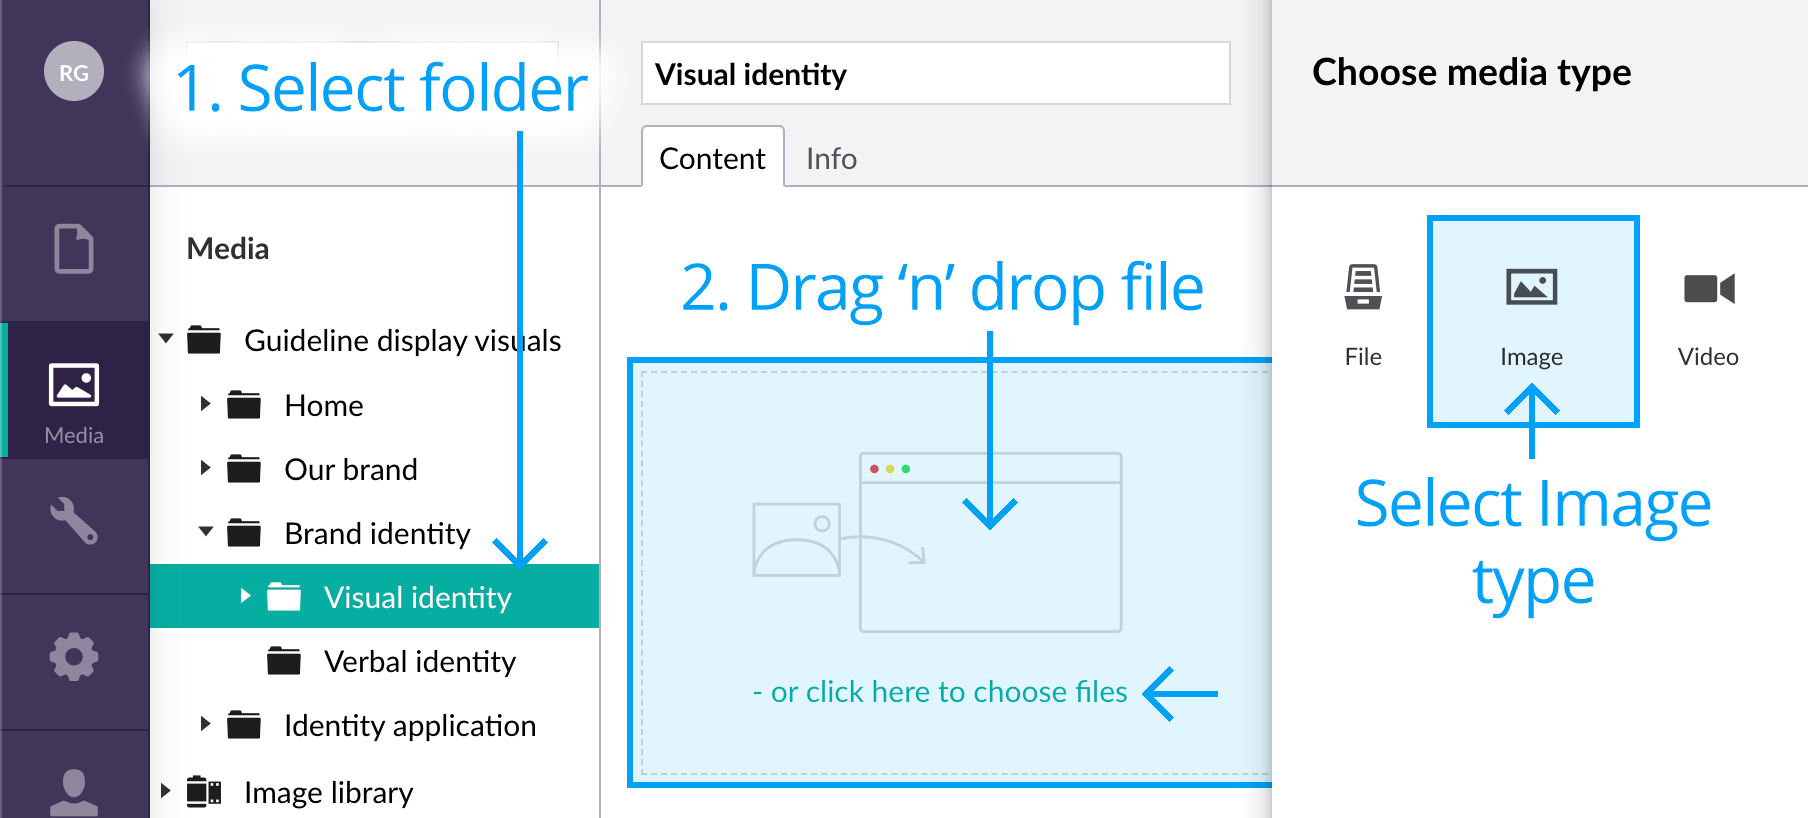
That’s it, done! You are now ready to link to this image from a page within the Content section.
Deleting an Image or File
If you wish to tidy up the Media section of your site, you can easily delete existing images. Once you have deleted an image, it is sent to the Recycle Bin. If you change your mind, you can restore the deleted image from the Recycle Bin^^.
- Right-click the image you want to delete and select Delete from the actions menu.
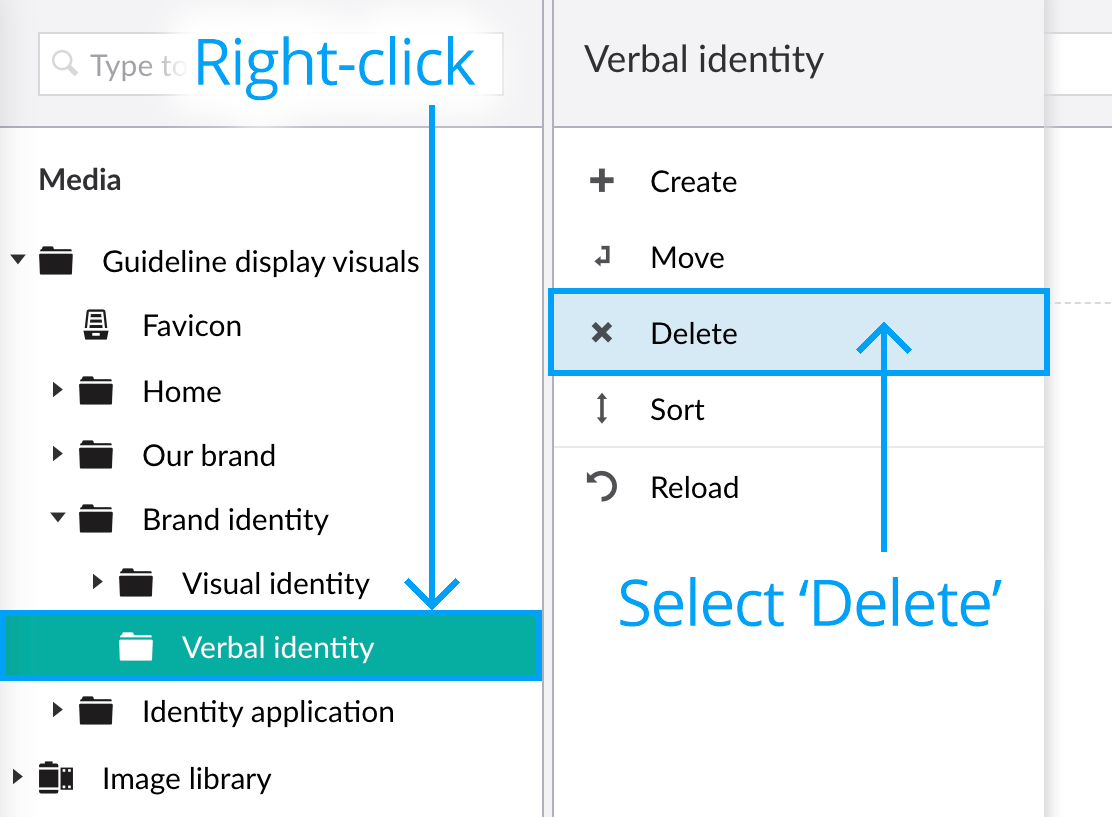
- Click OK to confirm deletion of the image or click Cancel to cancel deletion.
^^ Note: Recycle Bin items are automatically deleted after 30 days.
To delete images in bulk, select the folder to reveal the list view, and click multiple items to reveal the Move and Delete buttons.
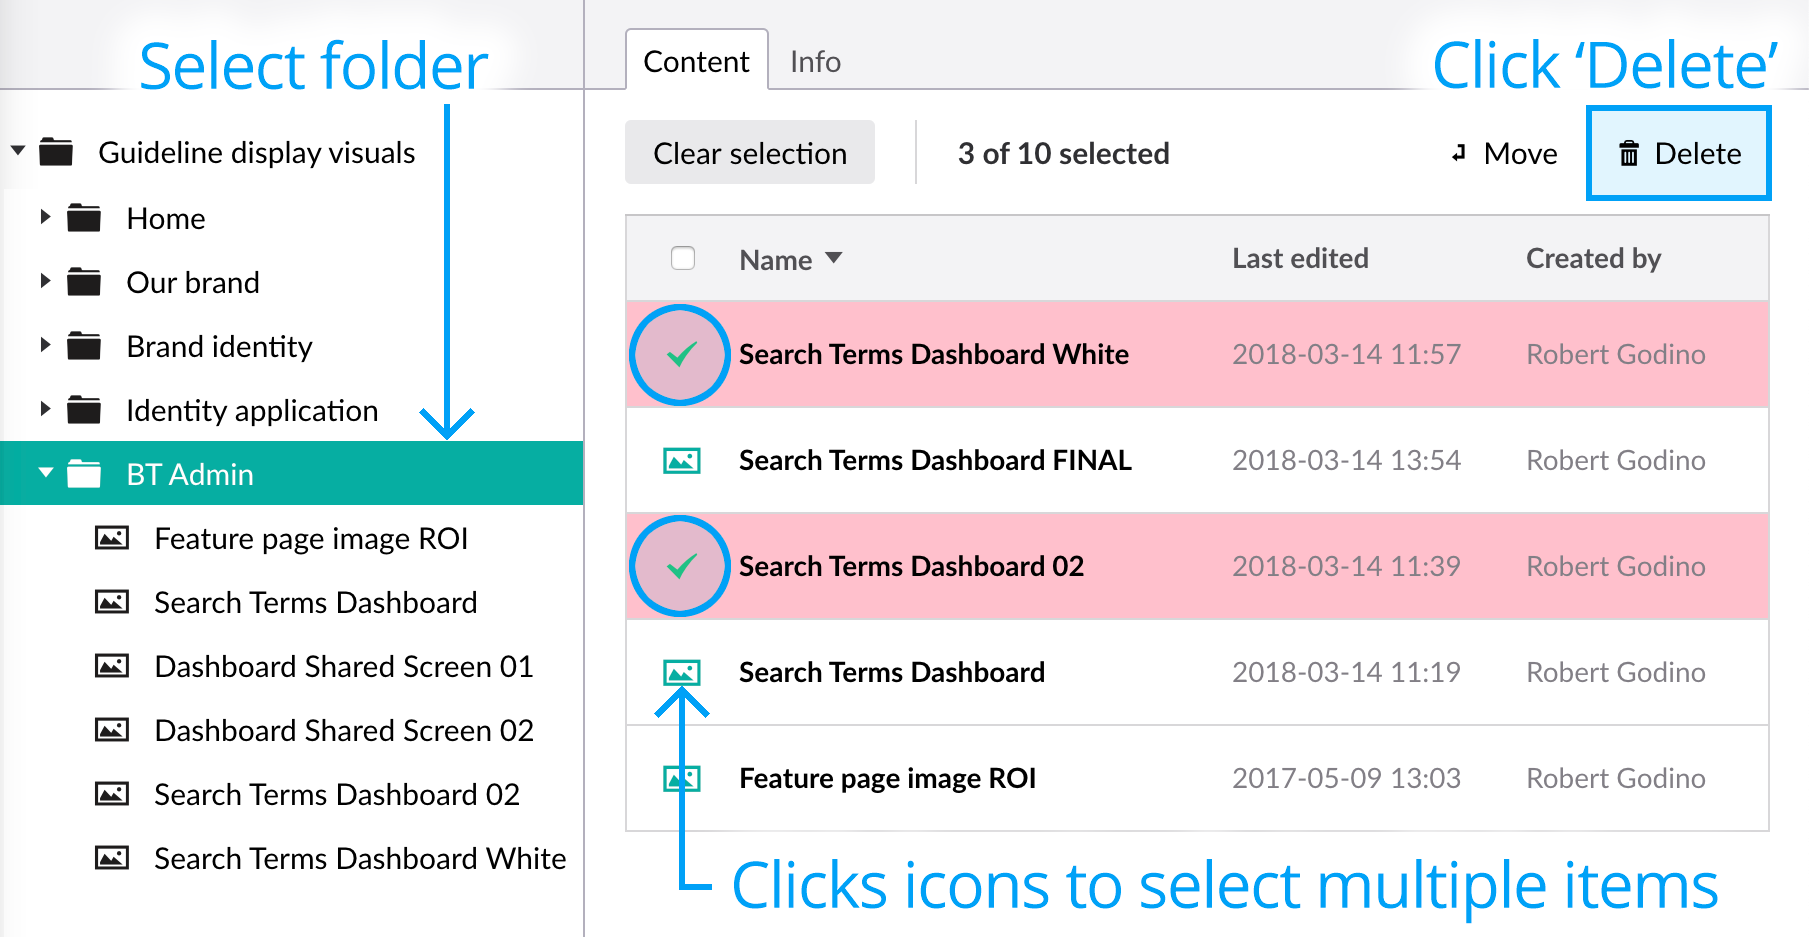
Click Delete.
Moving an Image or File
You can easily move images between folders within the Media section using the Move function.
- Right-click the image you want to move and click Move from the actions menu.
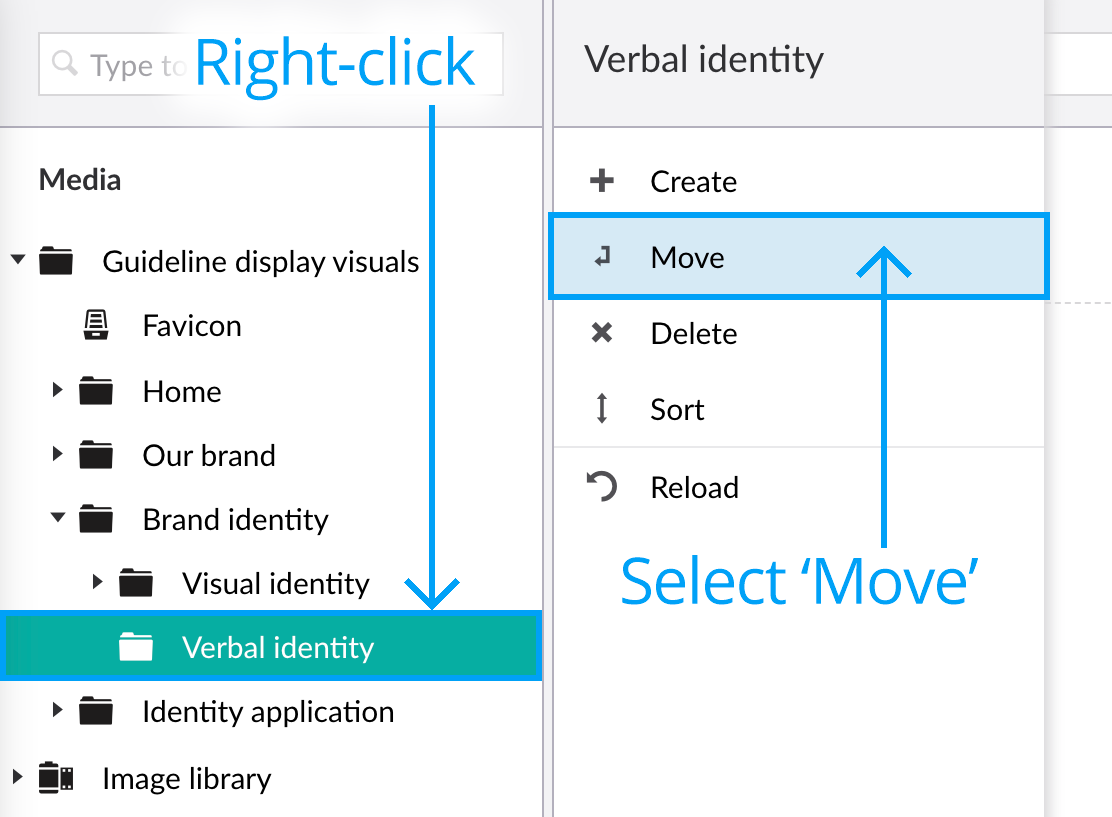
- Select the folder where you want to move the image into. In the example below, we want to move the image to be within the ‘Our brand’ folder, so we select the ‘Our brand’ folder.
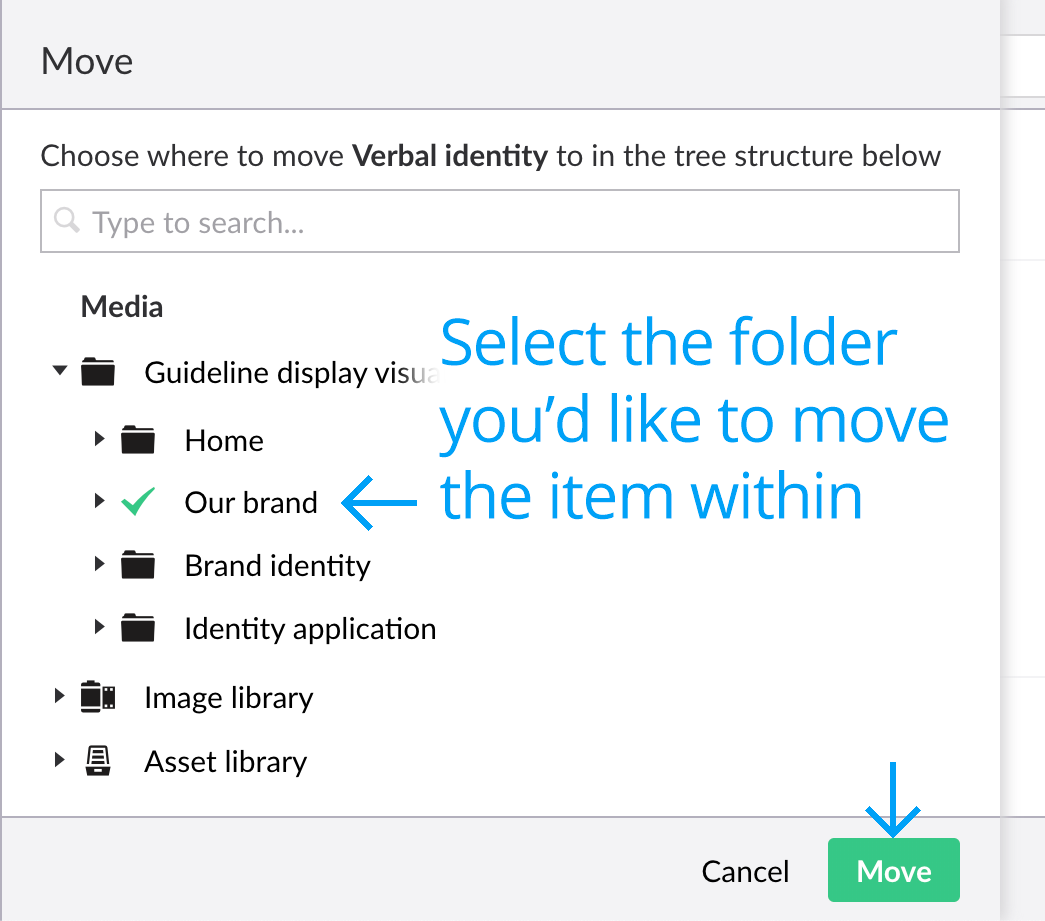
- Click Move to confirm.
To move images in bulk, select the folder to reveal the list view, and click multiple items to reveal the Move and Delete buttons.
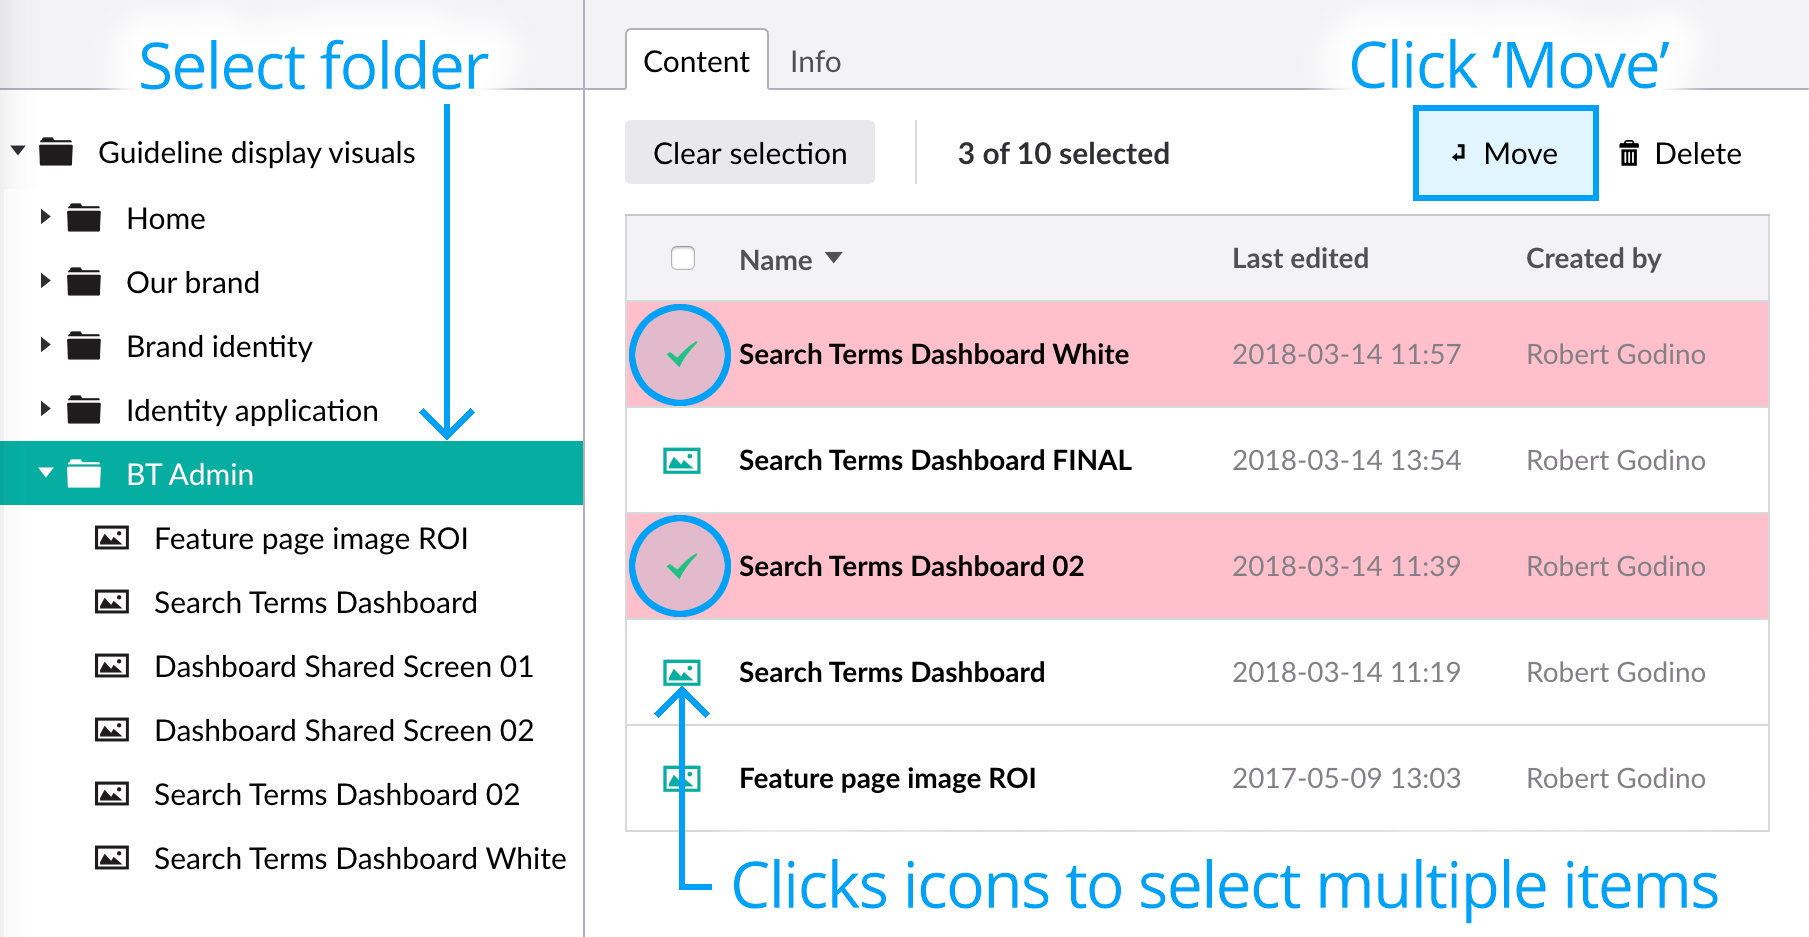
Click Move.
Next page: Photo library
Back to top