The Brand Toolbox text formatting toolkit works much the same way as those found in most word processing applications (such as Microsoft Word).
Formatting buttons
The most familiar way to control formatting is via the formatting buttons. With these buttons, you can apply simple formatting such as Bold and Italic, as well as altering text alignment and creating bullet and numbered lists.
![]()
Regardless of the formatting being applied, the process for applying a format using the formatting buttons is always the same:
- Select the text you want to apply formatting to.
- Click the formatting button to apply the formatting you wish to add.
Formats

Another way of apply formatting is via the Formats dropdown list. The Formats list provides a set of predefined styles that can be applied to text whilst maintaining a consistent look and feel throughout the site.
These styles often incorporate more advanced formatting functionality, such as headings, sub headings and paragraphs. Whilst the styles available on your site may differ, the process for applying styles is always the same:
- Select the text you want to apply the style to.
- Select the style to apply from the Format dropdown list.
Copying content from other programs
Text can be copied to Brand Toolbox from any other source programs. The important thing to remember is to correctly paste in the text.
Text should first be copied to a plain text application, such as TextEdit, SimpleText or OneNote. When using these text programs, ensure ‘plain text’ is selected.
By pasting content in this way, it ensures that only those formatting rules allowed by the system are kept and that the integrity of the site is maintained. If you do paste in formatted text from another application, you can remove some of the formatting from the text by following the process outlined in Clear formatting below.
 Clear formatting
If you have formatted a paragraph or selection using the formatting buttons, you can remove a formatting rule by selecting the text, and clicking the relevant formatting button to remove that formatting rule. You may also use the Clear formatting button in your toolbar.
Using the Clear formatting button on selected text also strips out any foreign formatting applied when pasting text from other programs. Note however that it is not always 100% effective.
 Show/hide HTML source code
If you are proficient in the use of HTML, you can switch to HTML mode and create your page by writing HTML code. You can also check the code and make minor adjustments here to get the page exactly as you want it.
This is particular useful when working on more complex layouts such as table layouts and table formatting.
Source code style
The rich text editor allows you to add stylistic formatting to programming language source code and markup. The “prettyprint” source code class beautifies the code snippet so typical formatting conventions, such as positioning and spacing (indent style), colour and contrast (syntax highlighting), make code content easier for people to view, read, and understand.
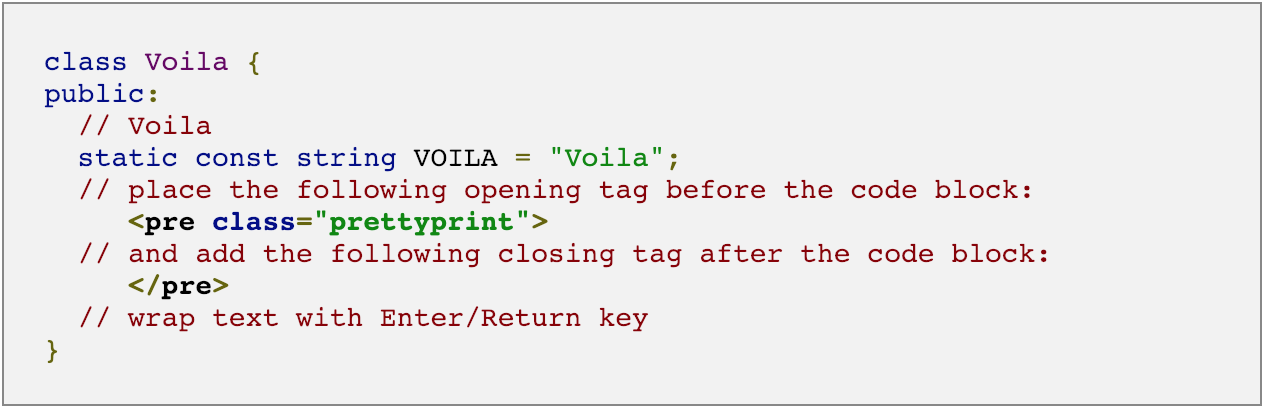
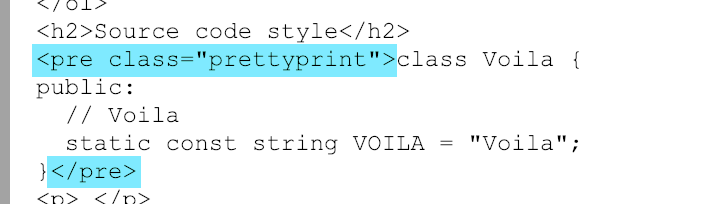
To style a code snippet per the example above, add your source code to the rich text editor content window and enter HTML mode by clicking the Source code ![]() icon. Then place the following opening tag before the code block, <pre class="prettyprint">, and the following closing tag, </pre>, after the code block per the sample below:
icon. Then place the following opening tag before the code block, <pre class="prettyprint">, and the following closing tag, </pre>, after the code block per the sample below:
If your instance doesn’t have the ‘Source code’ style available, please contact the Brand Toolbox team: info@synrg.com.au
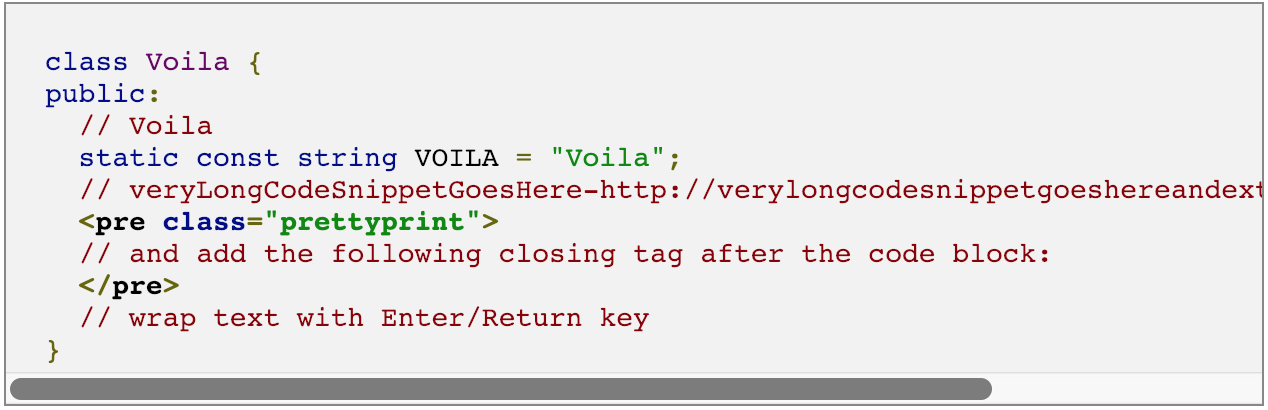
Note: If you prefer your source code snippet to not wrap within the text block (and thus remain horizontally and visually correct), please contact the Brand Toolbox team to adjust your CSS styles, as per the following:
Note to BT team:
In the ‘paragraph_styles’ css file, remove the following code from the ‘pre.prettyprint’ class:
white-space: pre-wrap;
and add:
overflow-x: auto;
Next page: Links
Back to top