Follow the steps below to create an Asset within the Assets Folder.
Note that Brand Toolbox allows you to upload multiple assets in batch. To upload assets in batch, see Batch uploading assets.
—
Create an Asset individually
- Right-click an existing Assets Folder node and click Create.

- Type in a name for the asset.
- Select Asset as the media type and click Create.

Once the Asset has been created, you need to enter the Asset properties. These properties determine who sees the asset and the categorisation for the asset.
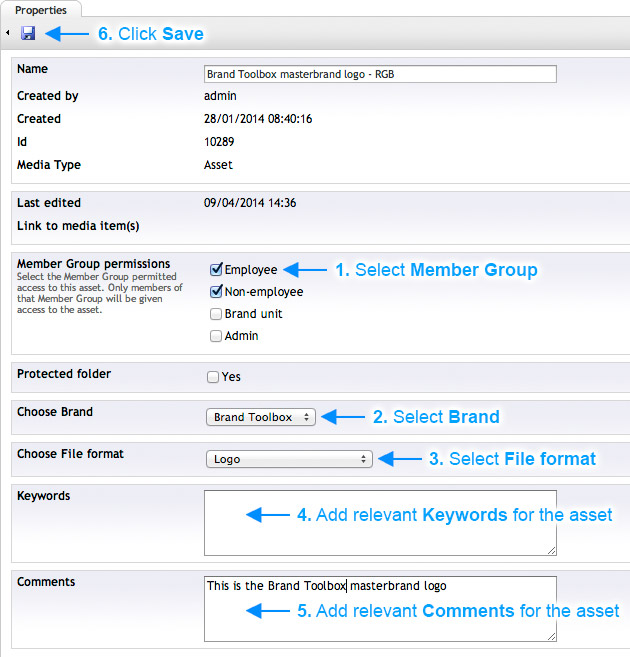
- Under Member Group permissions, choose Member Group.
This enables permission for members of that Member Group to access the asset. Add as many Member Groups as you wish. In most cases, Employee and Non-employee are selected. However, if you only want the asset to be seen by employees, then only select that checkbox. If you want the asset to be seen by the Brand unit, then only select that checkbox and leave others blank. - Choose the Brand.
Note that not all Brand Toolbox installations will have multiple brands. If yours does, this is where you assign the asset to that brand. - Choose the File format (ie. Logo, MSWord, PDF, video, artwork, etc).
- Add relevant Keywords for the asset.
Note that keywords should be separated by a comma (ie. keyword1, keyword2, keyword3 etc). Type in as many keywords as you wish. Ten to fifteen keywords are sufficient. - If you wish, you can add any Comments relevant to the asset.
- Click the Save button.
Next step: Create an Asset Version. You must create an Asset Version, for your Asset to be published successfully.
Please disregard the Protected folder field. It is not applicable in this version of Brand Toolbox.
Next page: Create an Asset Version
Back to top