By default, all downloadable assets (documents) uploaded to the system appear in the Asset library. Additionally, Brand Toolbox allows you to include these downloads on guideline pages across the site.
For example, as well as the user being able to download the ‘Masterbrand logo’ from the Asset library, you may want to include the ‘Masterbrand logo’ download on the Logo guidelines page.
This gives users quicker access to the downloads when browsing guidelines pages.
Add a download to an individual content page
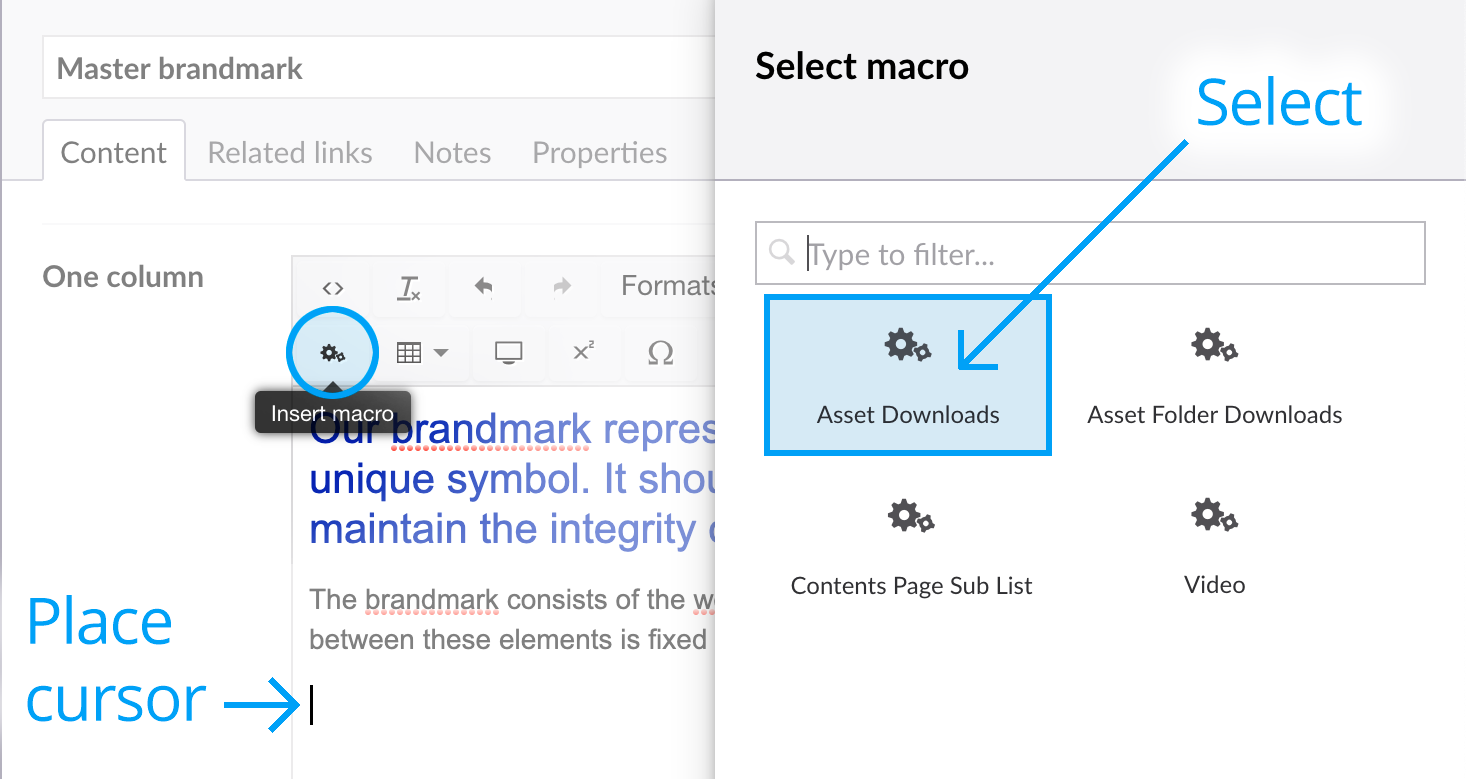
In the rich text editor of the selected guidelines page, place your cursor at the desired content insertion point and select the Insert macro button ![]() in the tool palette.
in the tool palette.

From the Select macro slide out panel, select Asset Downloads to reveal the downloads macro properties.
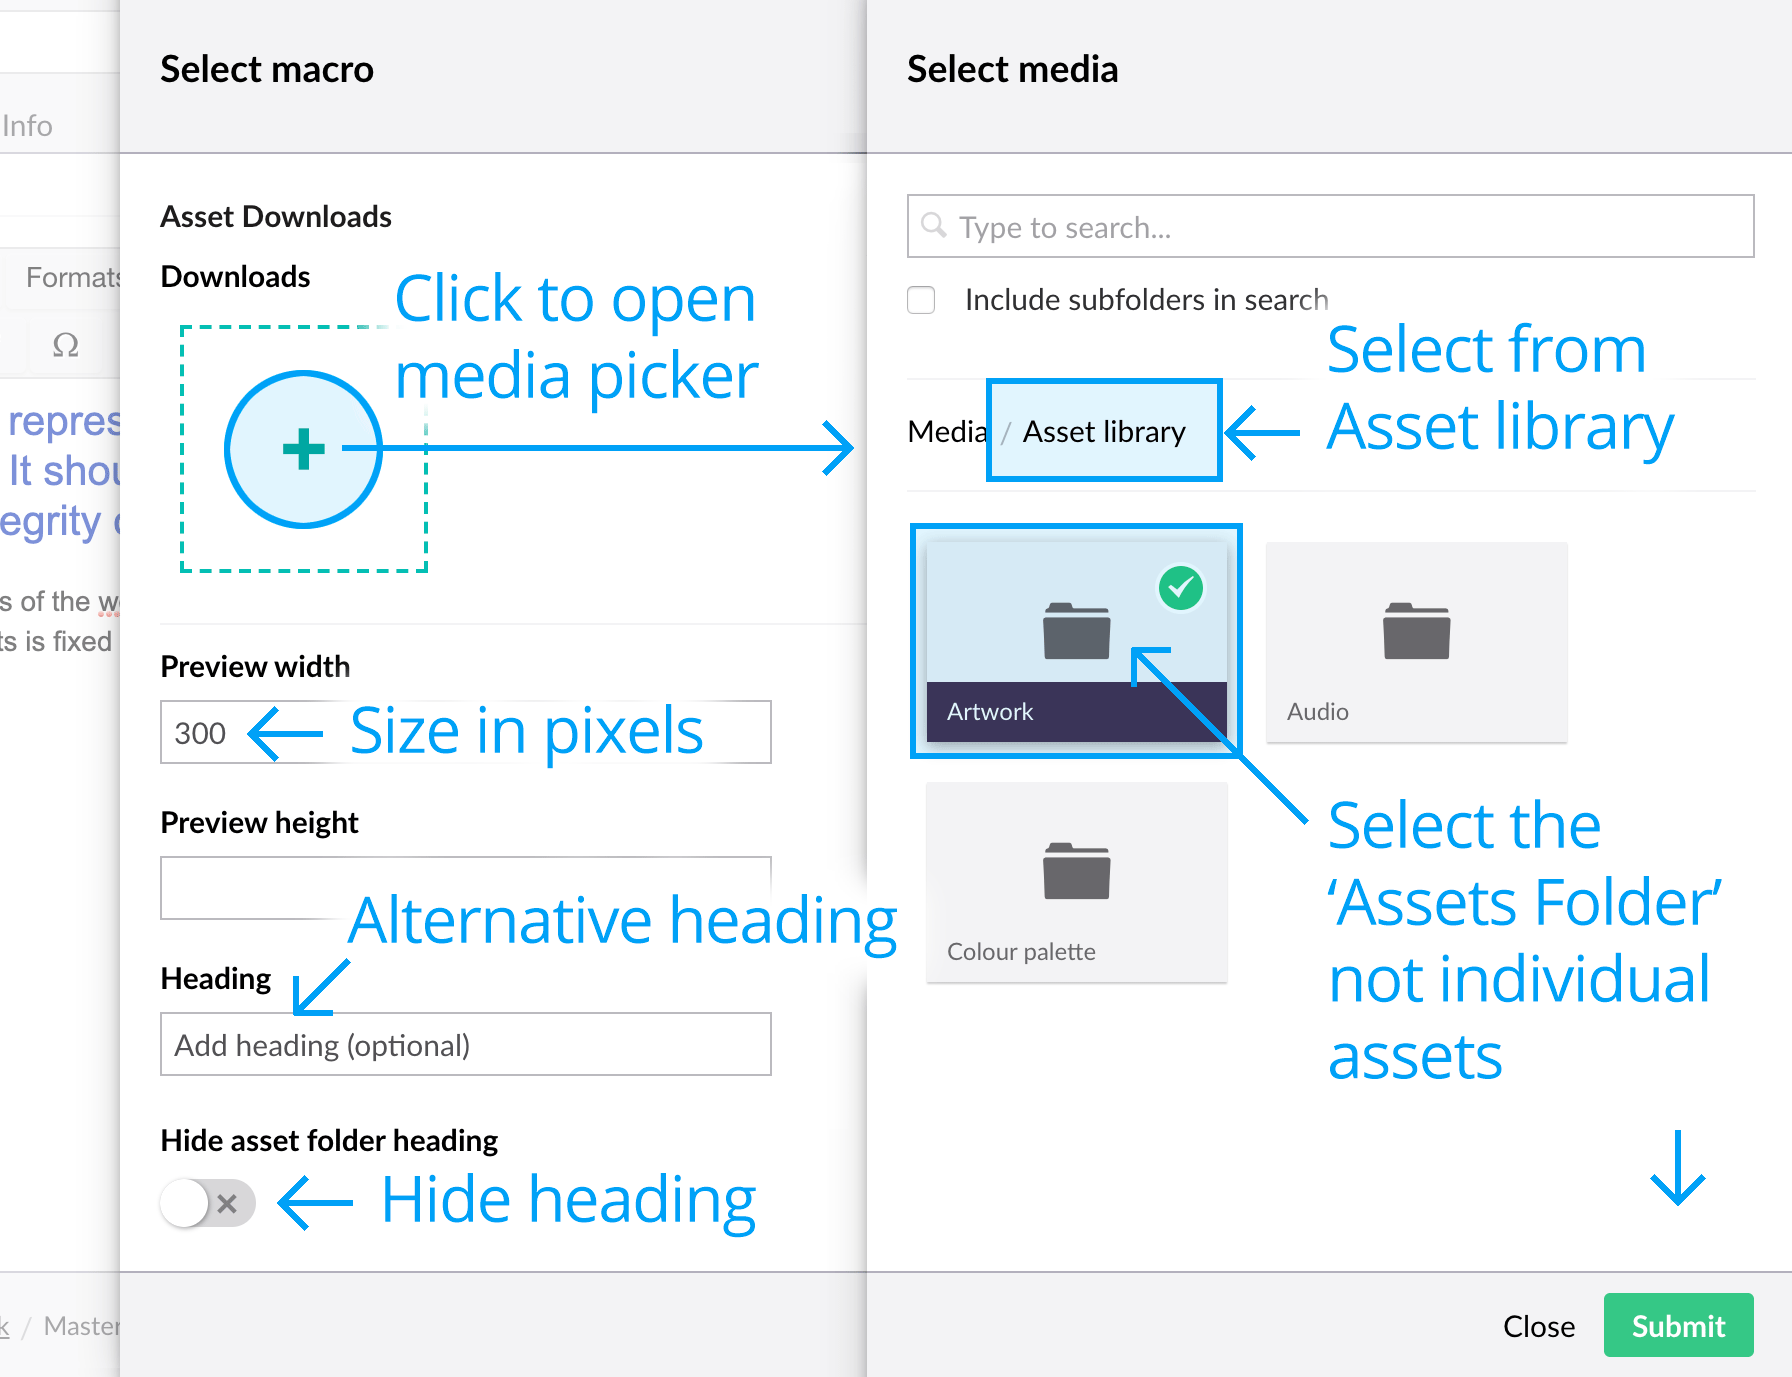
Next, click the Add + button (see below) and navigate through the Asset library folder structure until you find the asset/s you want to include. Remember to select the Assets Folder containing the assets and not the individual assets themselves (as shown below).

After selecting the Assets Folder, click Submit.
Enter the download container criteria here:
- Preview width – Either a width or height number must be specified (width is best). Setting a width determines the width of the download container that will appear on the page:
- The one column page is 630px wide
- The two column page is 300px wide
- Preview height – No need to enter if specifying a width above.
- Heading (optional) – By default, the name of the chosen Assets Folder is automatically inserted as a heading above the download container. If you would like to give it a different heading, enter an alternative into this field.
- Hide asset folder heading – If you would like to hide the heading altogether, toggle on this property.
Click Submit.
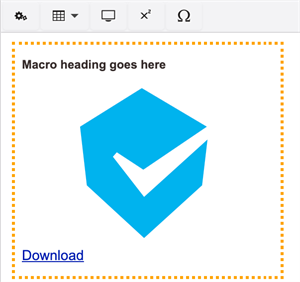
The macro is displayed in the editor with a yellow dotted border. Note that if multiple Assets appear in an Asset Folder, it will display the preview image of the first Asset in the folder.

Save and publish the page to view your changes.
Download macro options
There are two on-page asset download macros to choose from:
Asset Downloads
The contents of one chosen Assets Folder will be displayed as a single download container.
E.g.

Asset Folder Downloads
The contents of a chosen Assets Folder, containing multiple other Assets Folders, will be displayed across a 3 column grid as multiple downloads.
E.g.

Next page: Audio video playback
Back to top